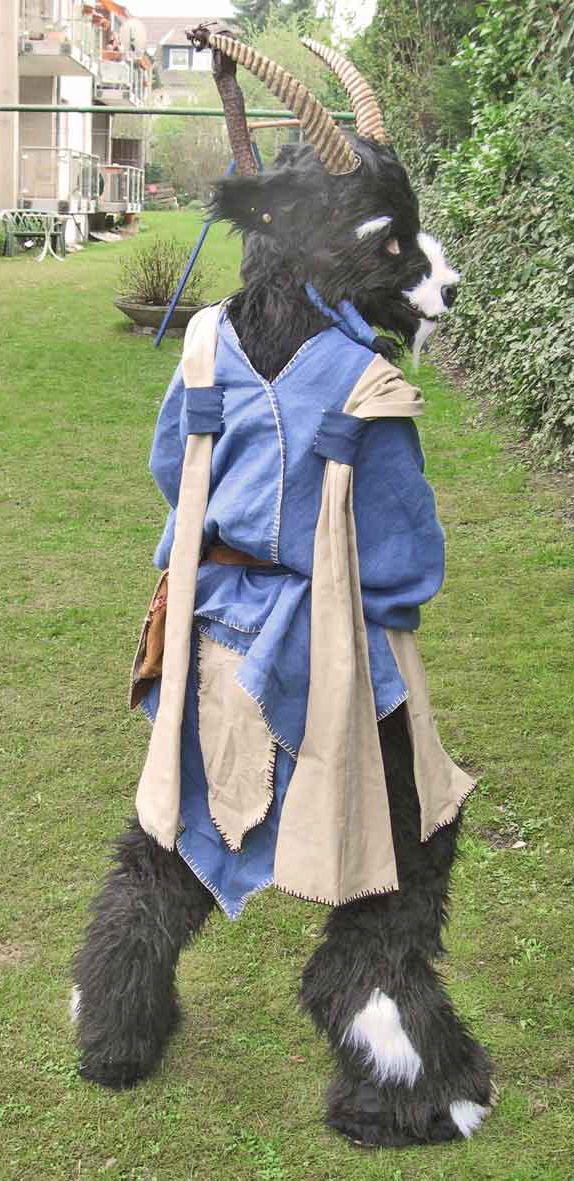
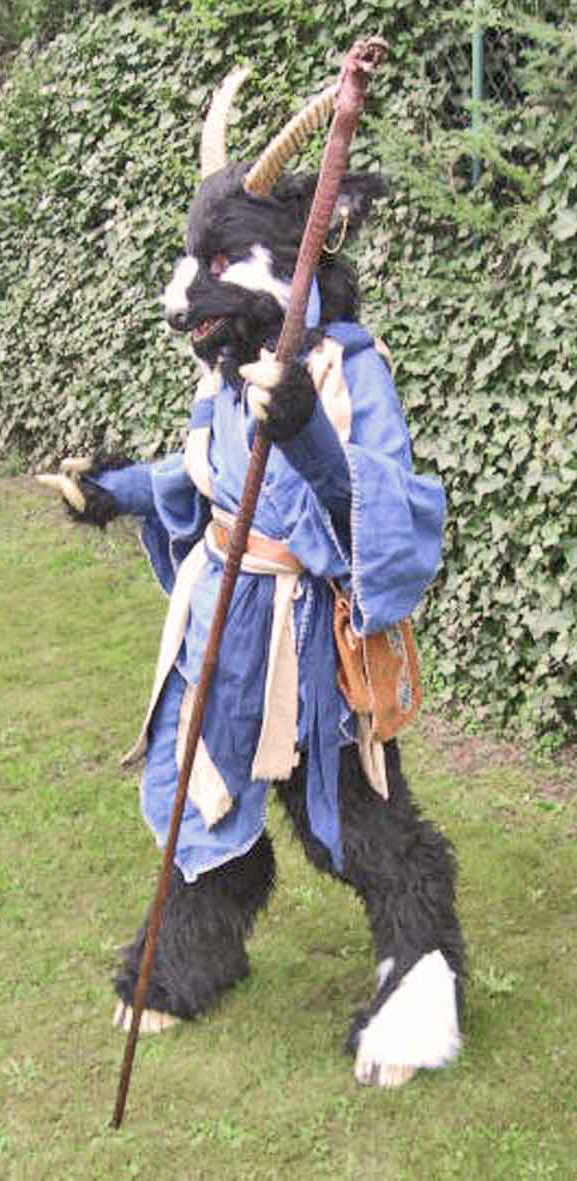
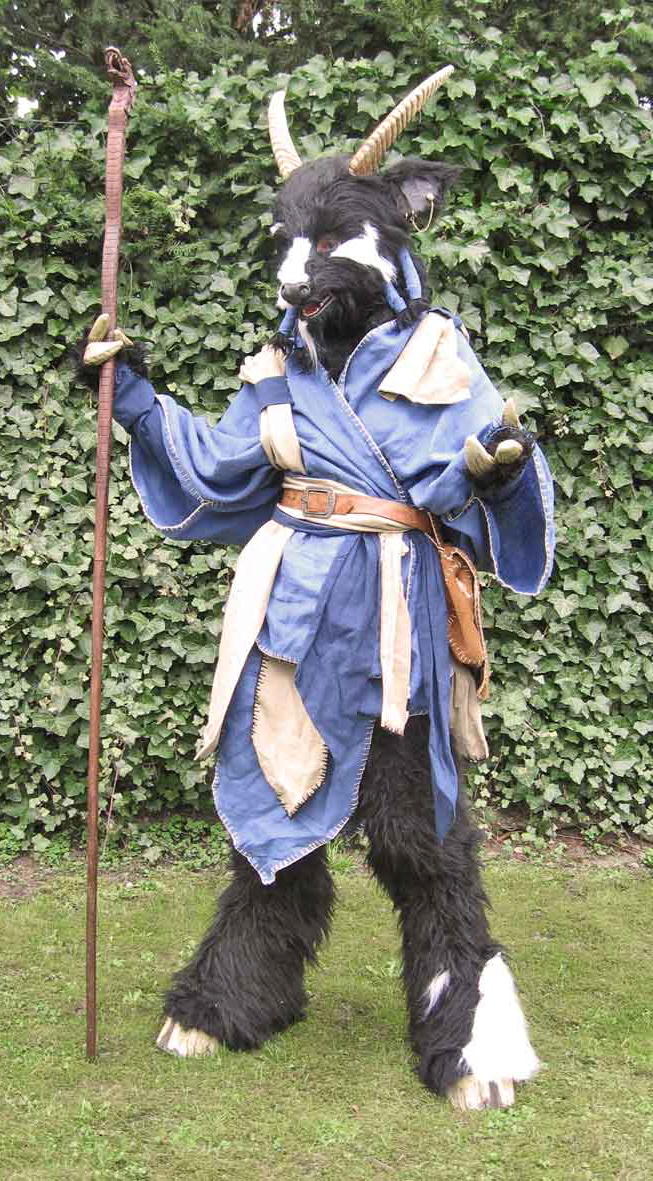
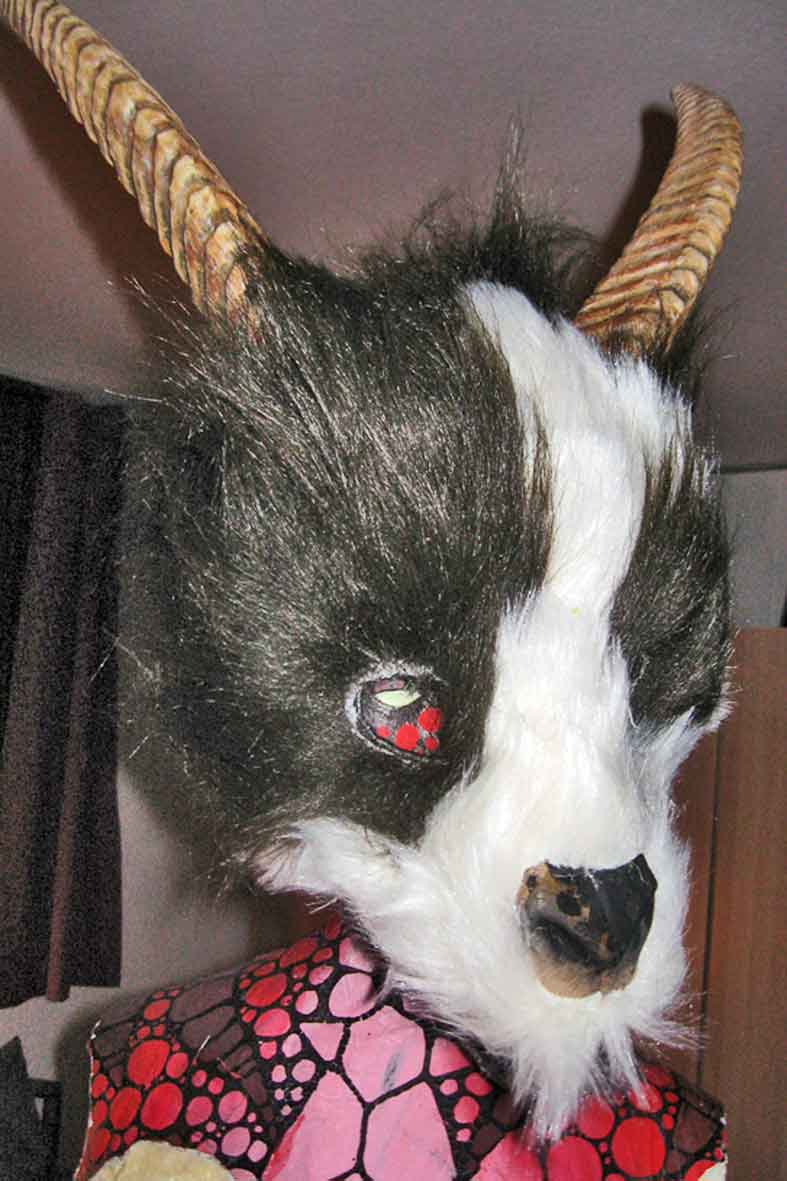
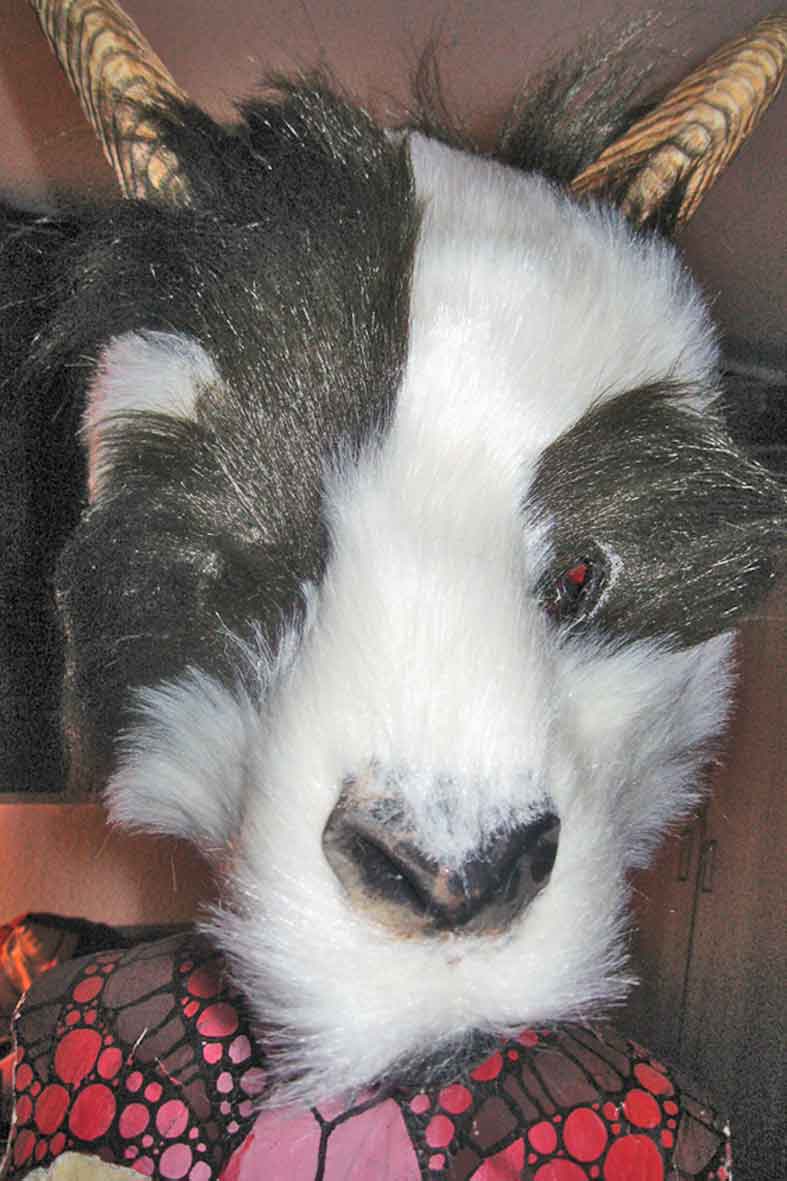
Annikaīs goat

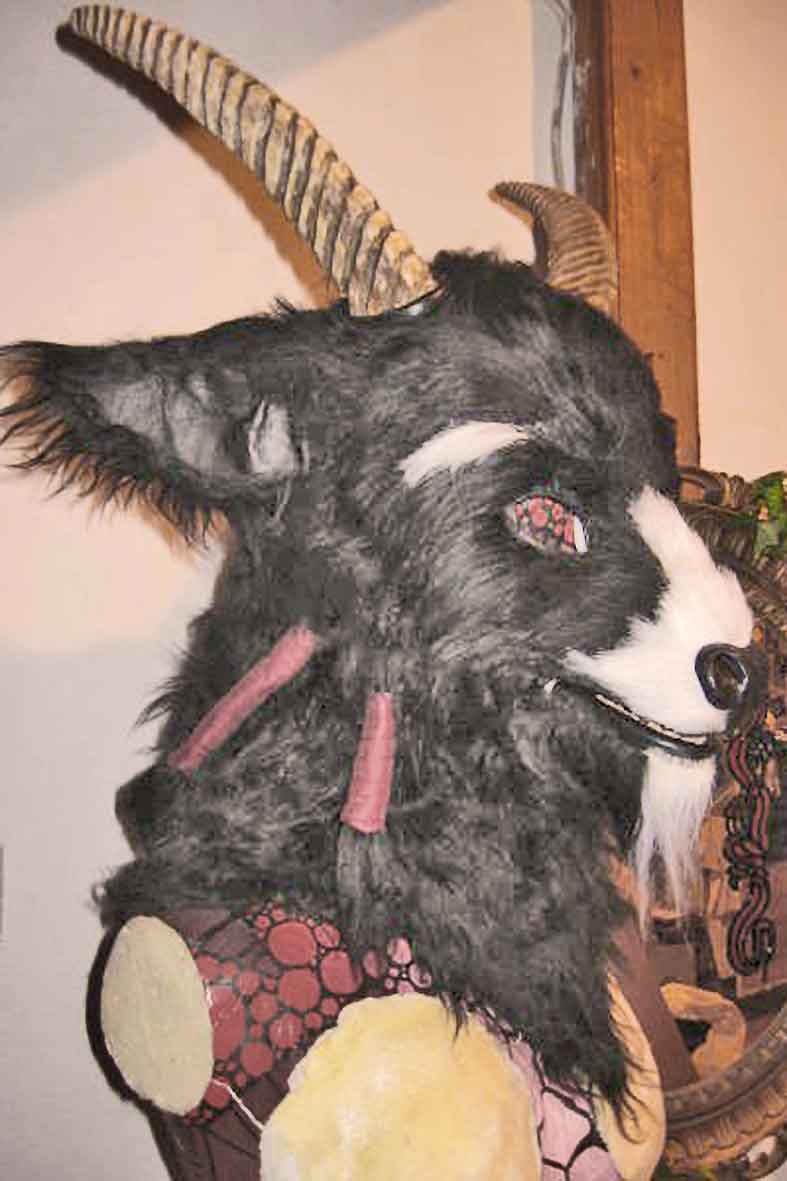
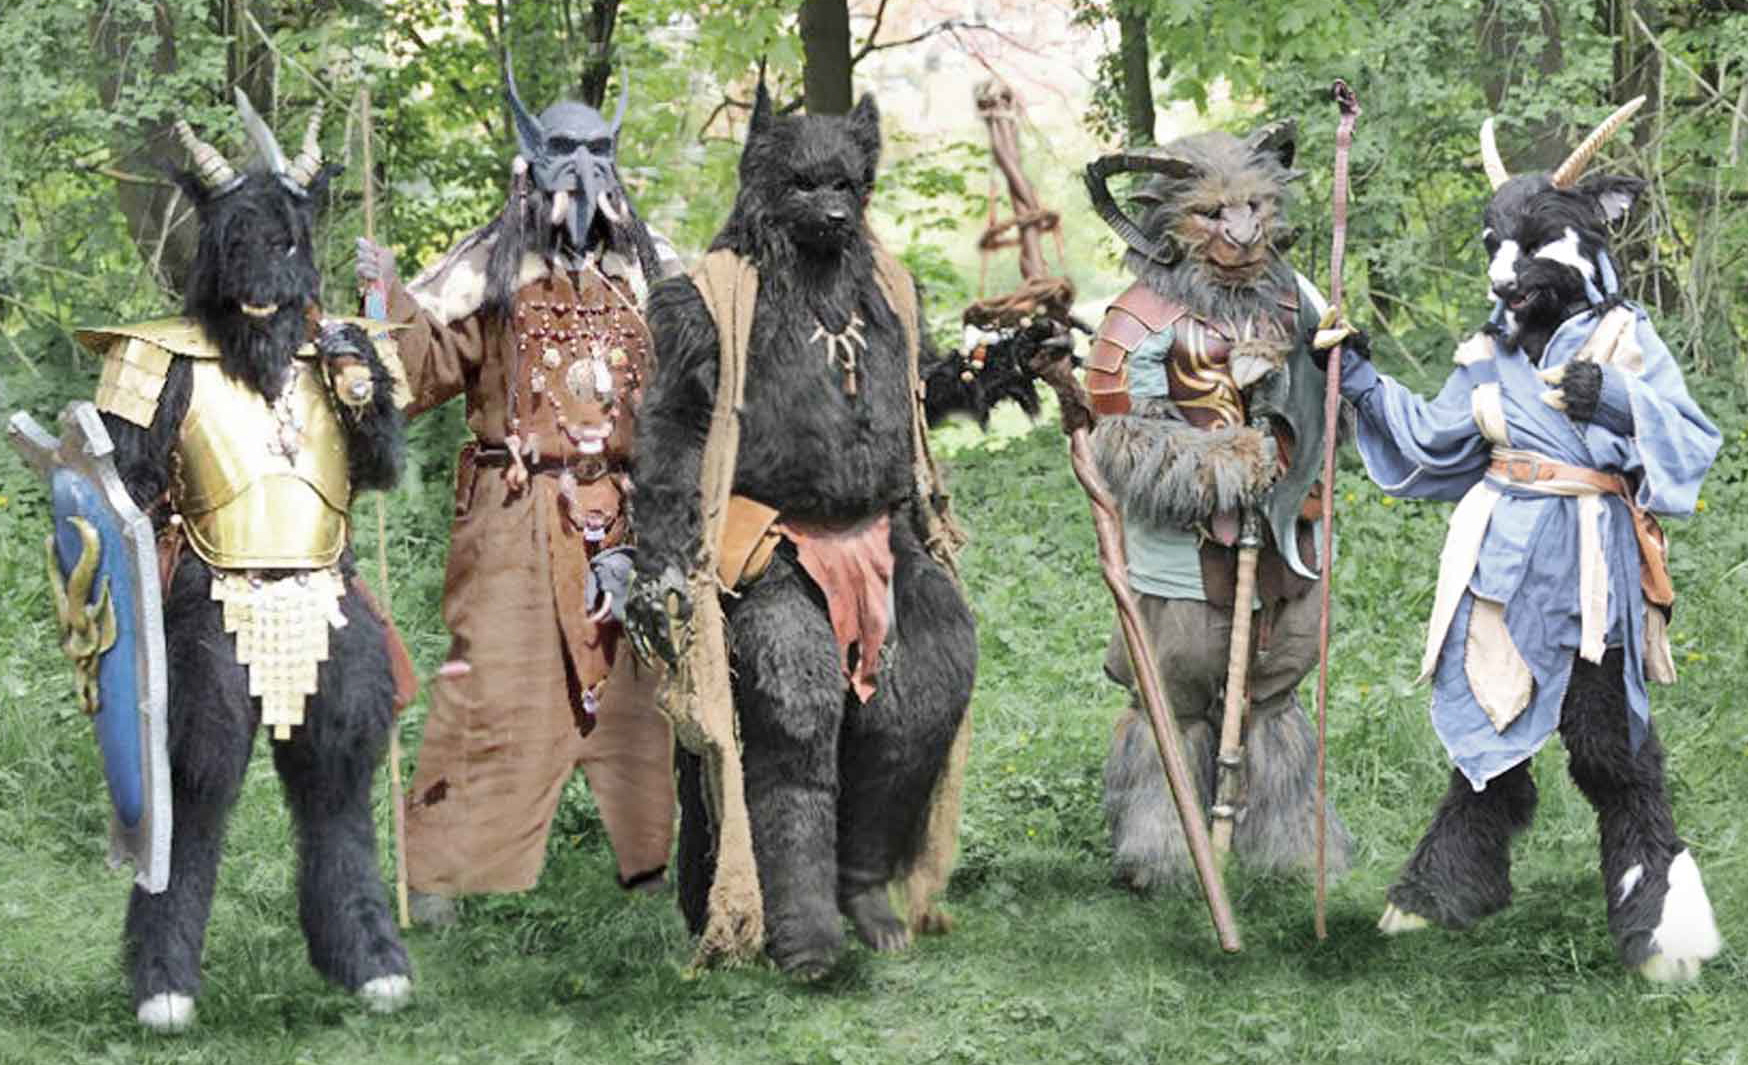
What is portrayed here is not a “monster” or “mutant” but an intelligent non-human lifeform. So the term “beastman” that has established itself to describe these creatures is therefore not quite correct either.
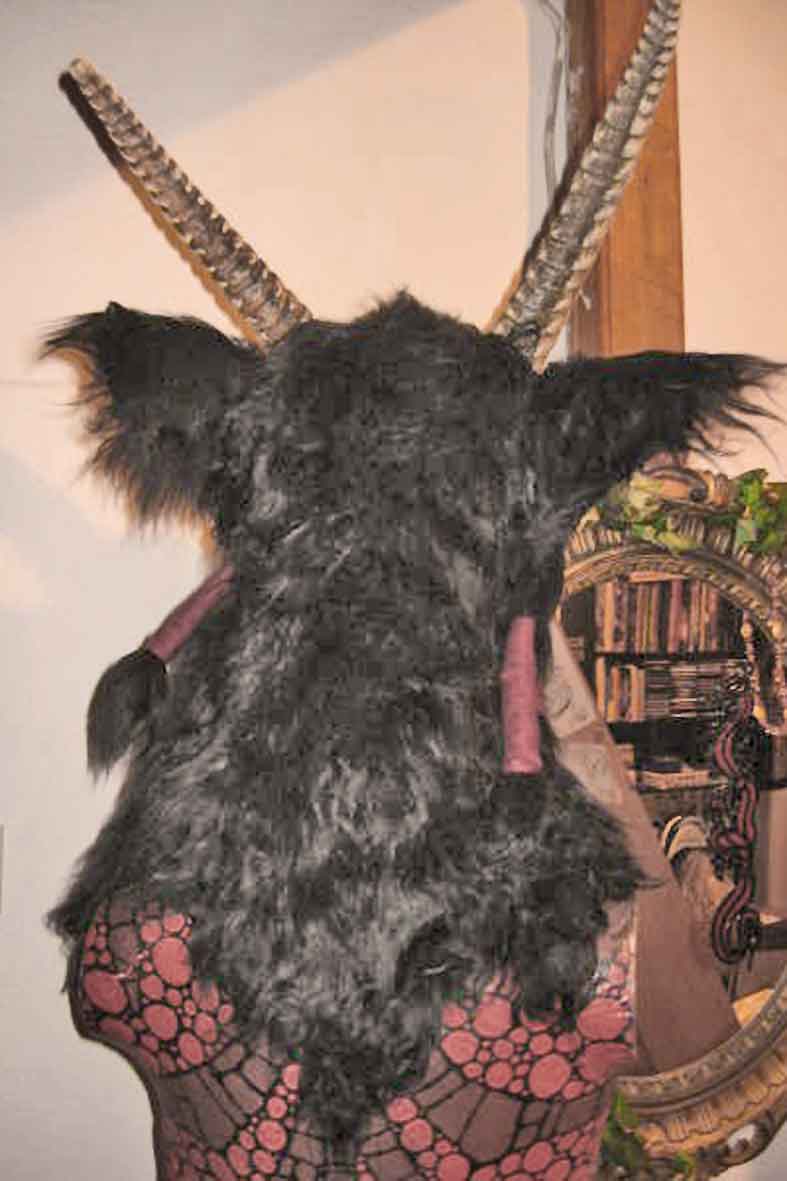
Good- quality non-humans are quite rare- but Annika ( http://luthienblogs.blogspot.de/ ) has found cool and functional solutions for all classic problems of this species: Mask, hands, legs, hooves, overheating, artificial- look of fur.
The result is - among other things- a costume that “realistically” alienates the human silhouette and in many details like style of clothing and accessories hints at “alien breed”.
The goat is no NPC- monster but a character; a player who isnīt working for the game organisators.

YMAn03
YMAn02
YMAn01

This Link leads to Youtube and shows the creature in motion:
http://www.youtube.com/watch?v=hP_eO8zbfdY&feature=related

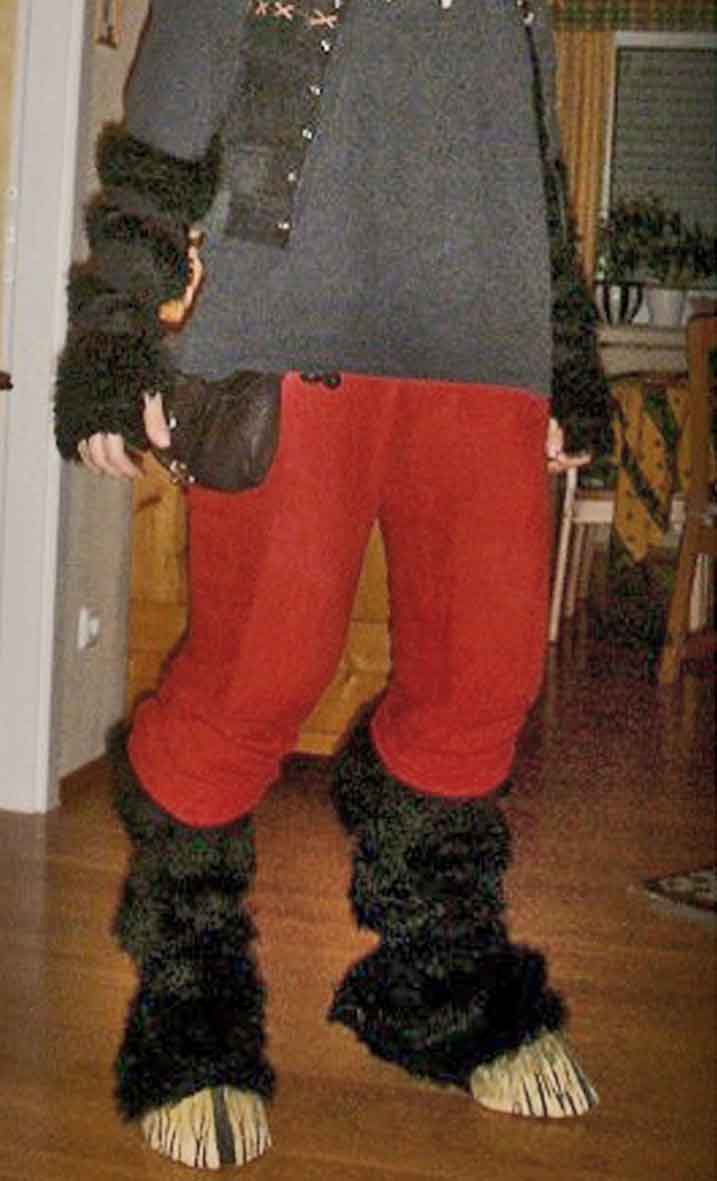
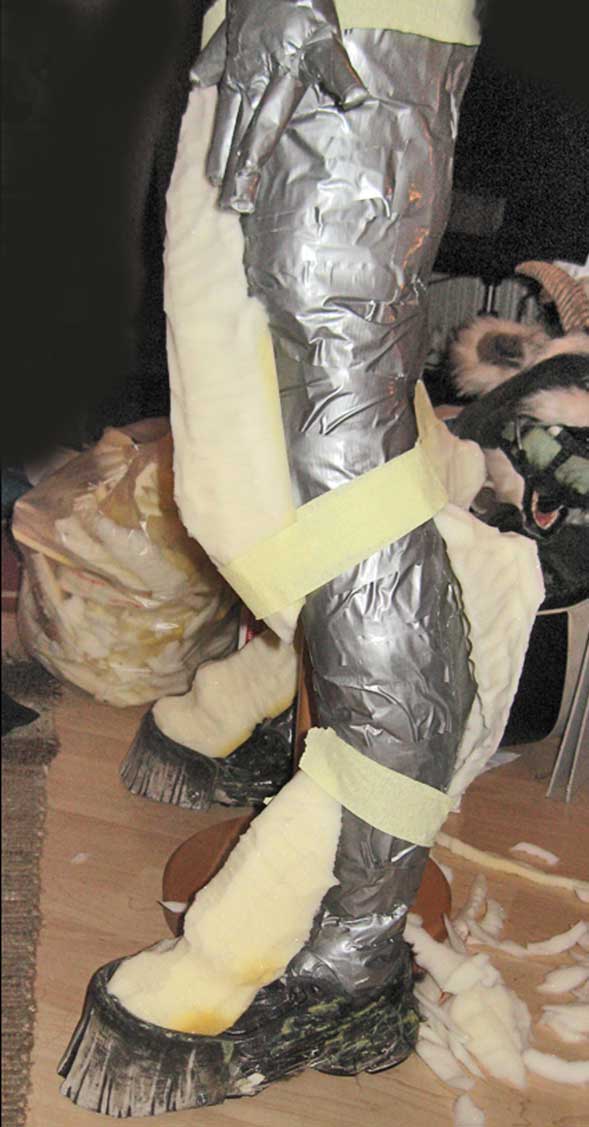
The “wrong-jointed” (digitgrade) legs are are created by planting paddings on thighs (to the front) and calf (to the rear). Placing them the right way so the legs look “real” is difficult though.
The puppeteer must implicitly walk on the whole foot; tiptoe- constructions wonīt look more “real” and are an outstanding opportunity to produce complicated ankle fractures.
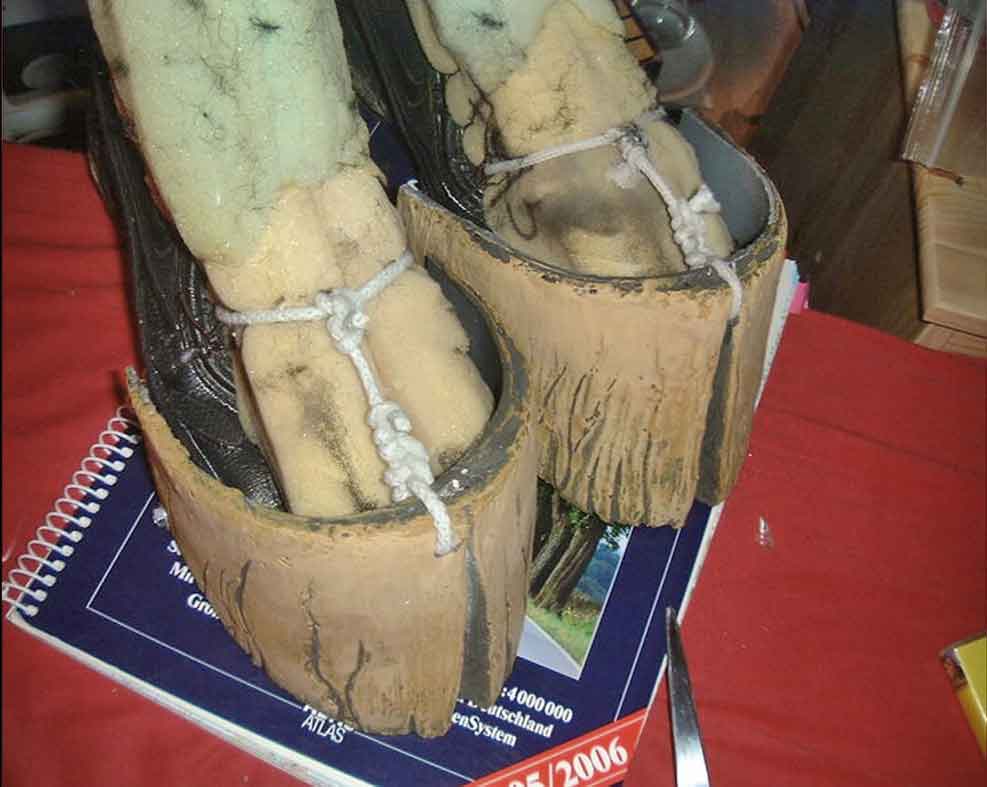
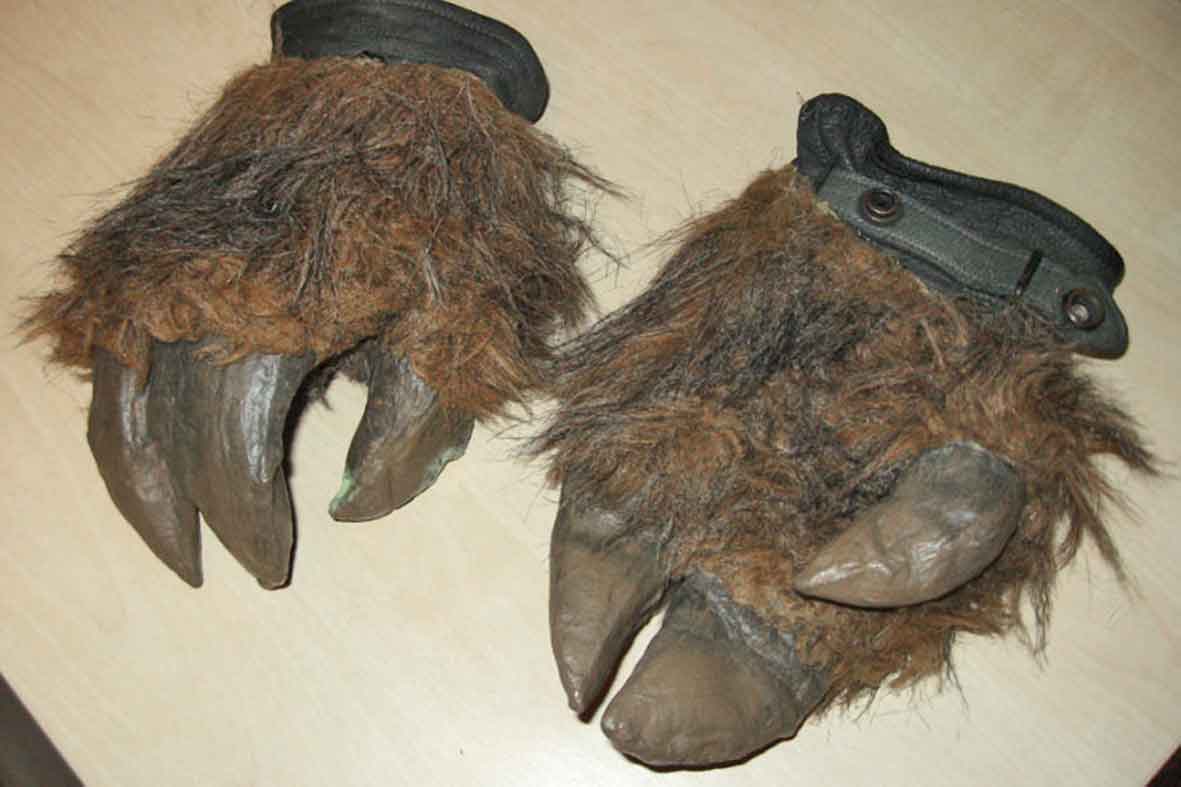
The hooves are positioned half round the foot and are formed with a third pad on the bridge of the foot about half- up the shin (below).

YMAn34
YMAn35
YMAn46
YMAn23

Above left:
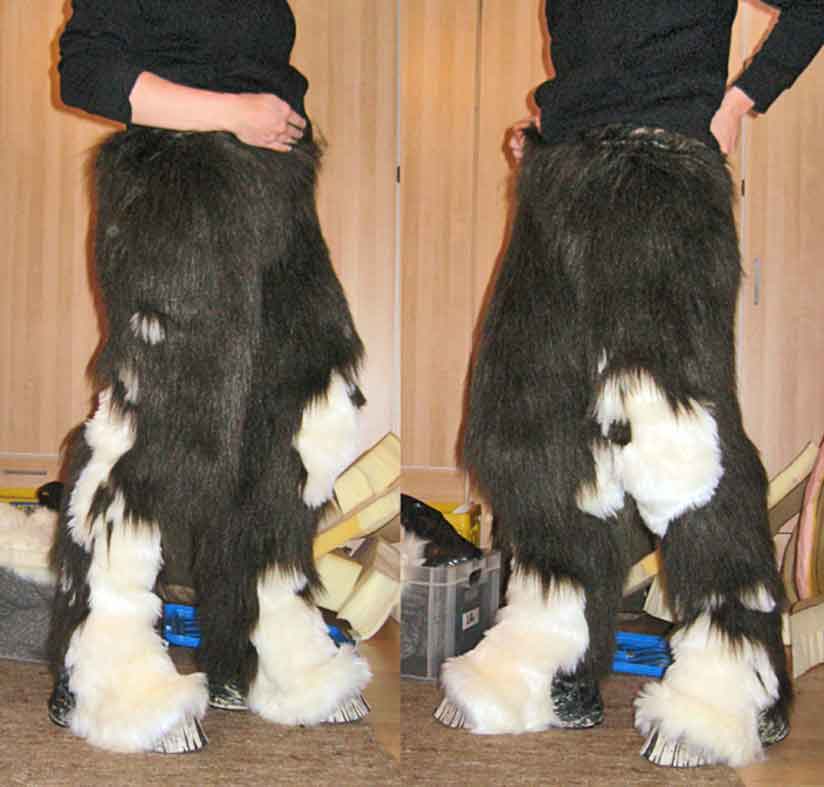
The goat has been completely revised this year (2011); here the new legs with complex two-colour- fur manufactured after real patterns.
The legs shouldnīt appear too massive to fit into the general impression of the creature; no easy job but if done like here the fascinating illusion of a non- human locomotor system comes up. Seeing good digitgrade legs in motion will make you doubt your reality.

Above right: The rare opportunity to get to see how the pads sholuld be arranged on human legs to create the “digitgrade” look. The picture shows them mounted upon a dummy during the process of making the sewing pattern.

The building of the legs is documented in Annikaīs Blog: http://panprojekt.blogspot.de/

YMAn04 YMAn05 YMAn06

Above:
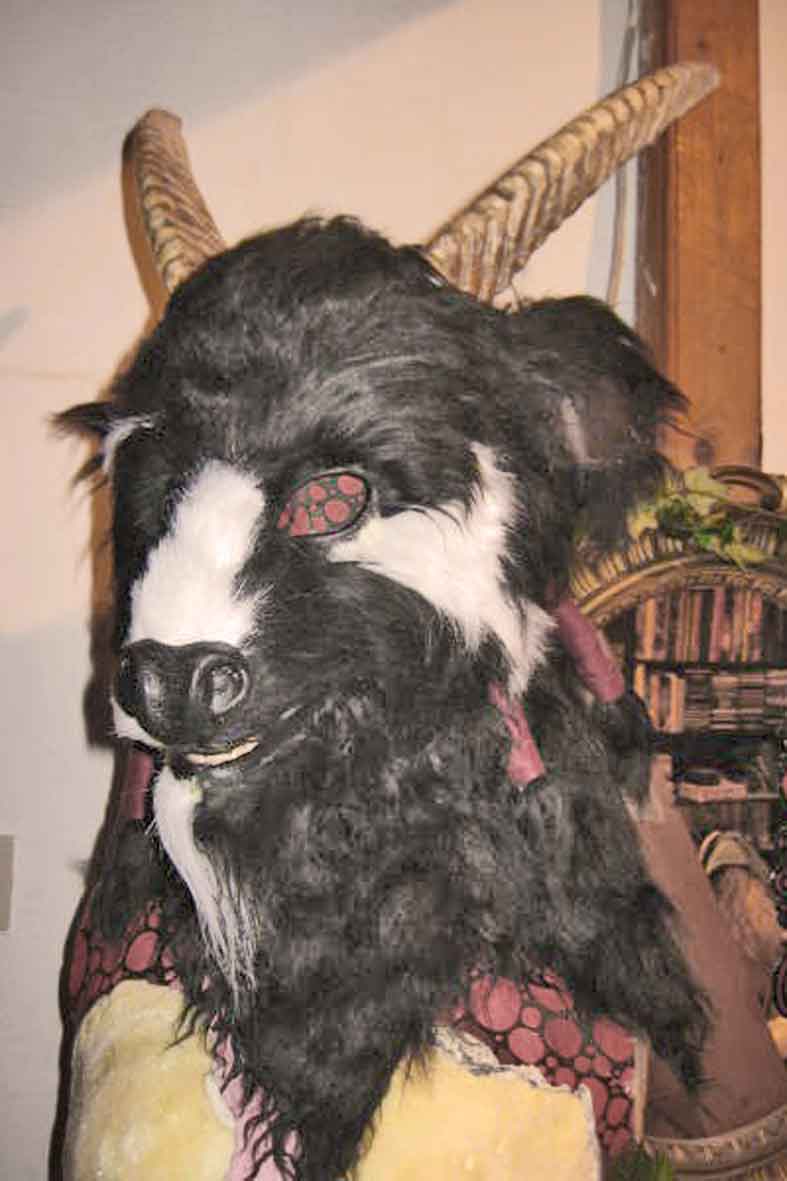
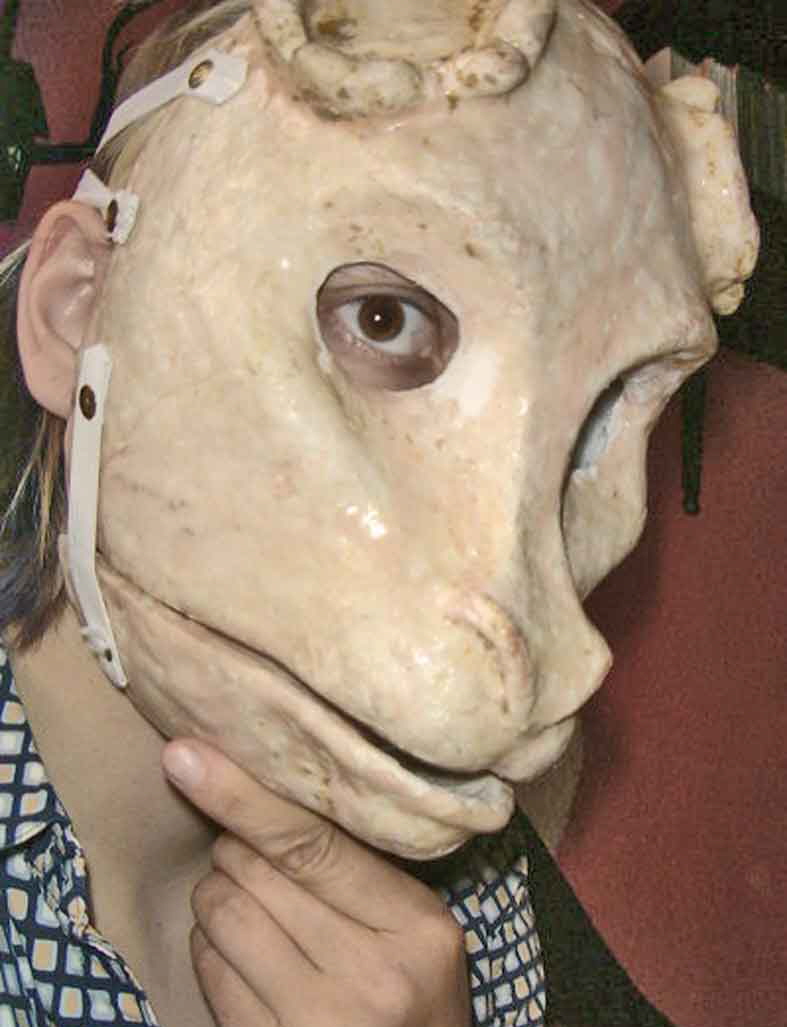
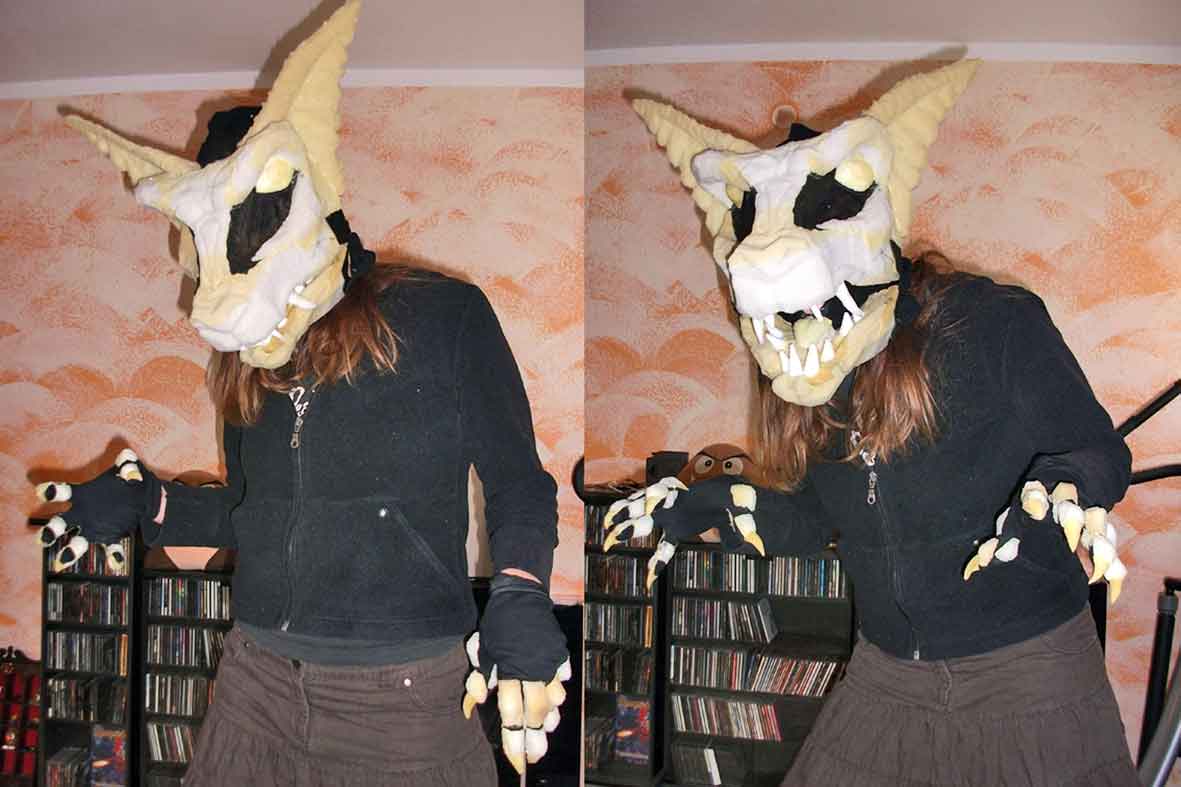
The original mask, consisting of a carcass built in the “linothorax- technique” and covered with artificuial fur.

YMAn38
YMAn37

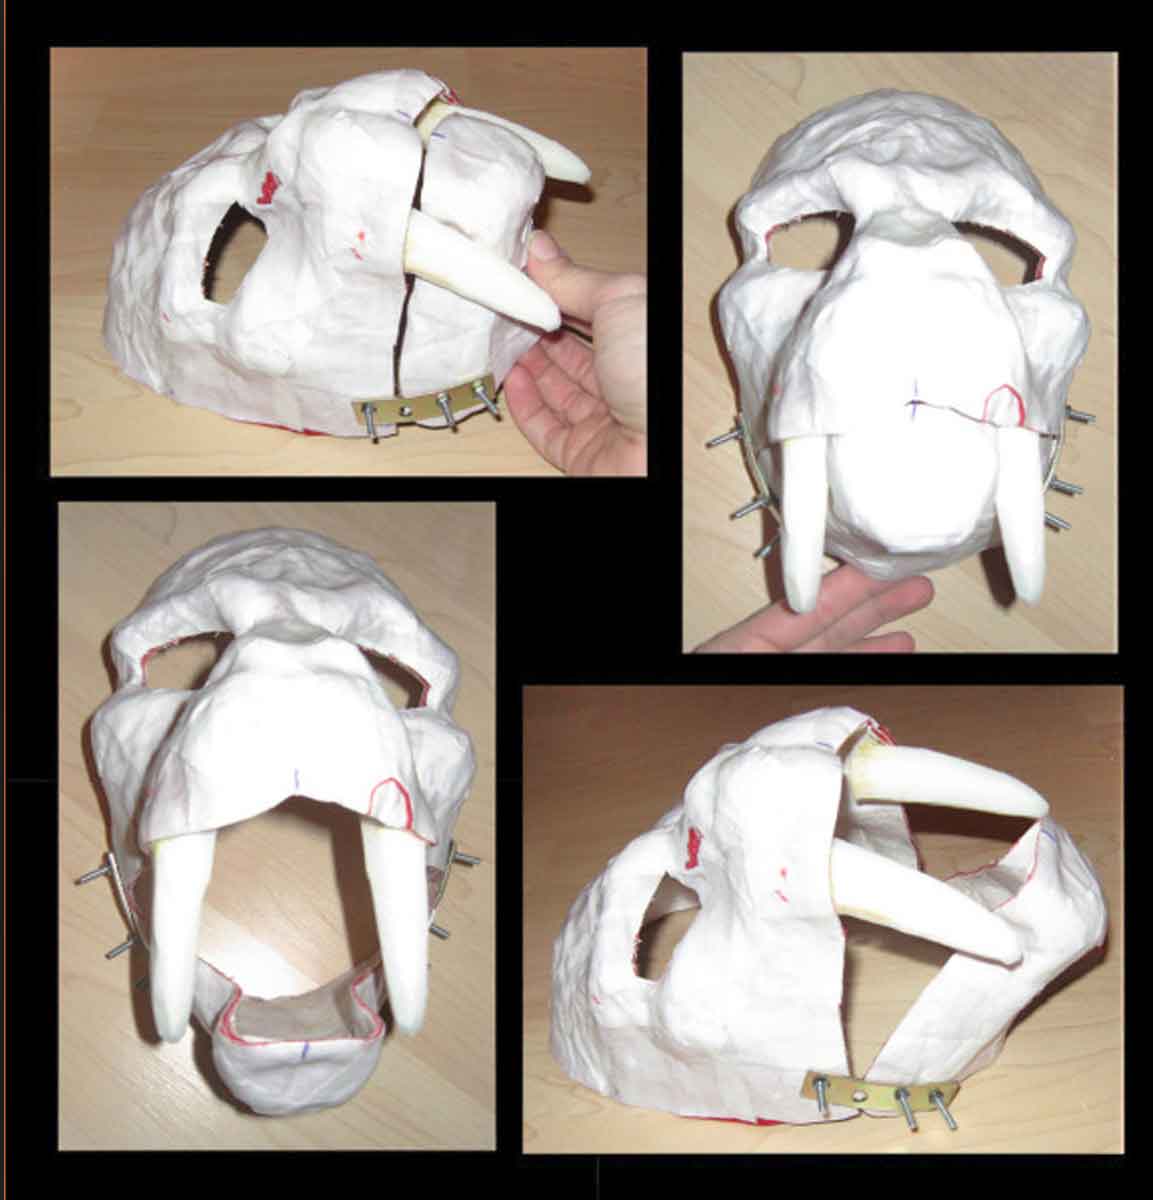
Above: Linothorax-masks (on the left the goat, on the right a sabre- tooth tiger).
The word originally describes a form of pre-medieval armour made of layers of cloth bonded together with glue. Nowadays it is in the process of establishing itself as the label for the material itself- prinipally a cloth/ glue- maché: very interesting substance. You can either shape it into a negative mould or cover a sculpture with it. A mask made of the stuff is very light and slightly flexible.

There are many ways to build creatures. In the inLarp- forum Annika has assembled an extensive collection of links dealing with all aspects of creating “beastmen”:
http://www.inlarp.de/larp-forum/tierwesen-bau-sammlung-t3646.html

Here some extracts:
http://www.hawke.de/haupt.html
http://fursuit.de/cms/index.php/Tioh%27s_Fursuit-Bauanleitung
http://tioh.dyndns.org/mediawiki/index.php/Fursuit_Bauanleitung
http://mitglied.multimania.de/tioh/howto_fursuit_tioh.htm
http://qarrezel.deviantart.com/art/Mask-Making-Demo-Part-1-A-102797331?q=gallery%3AQarrezel%2F7080403&qo=0
http://qarrezel.deviantart.com/art/Mask-Making-Demo-Part-1-B-102820052?q=gallery%3AQarrezel%2F7080403&qo=1
http://qarrezel.deviantart.com/art/Mask-Making-Demo-Part-1-C-102825358?q=gallery%3AQarrezel%2F7080403&qo=2
http://fursuit.tanidareal.com/
http://www.stripedsmiles.com/19CostMakingSt.html
http://community.livejournal.com/fursuit/profile
http://www.livejournal.com/tools/memories.bml?user=fursuit
http://www.beetlecatoriginals.com/tutorials.html
http://www.komickrazi.com/costumes/tutorials.html
http://www.youtube.com/watch?v=XdoETwKzubs

The new mask was built in another way (all pictures can be zoomed via rightclick context menu):

YMAn08
YMAn07 YMAn09

Above:
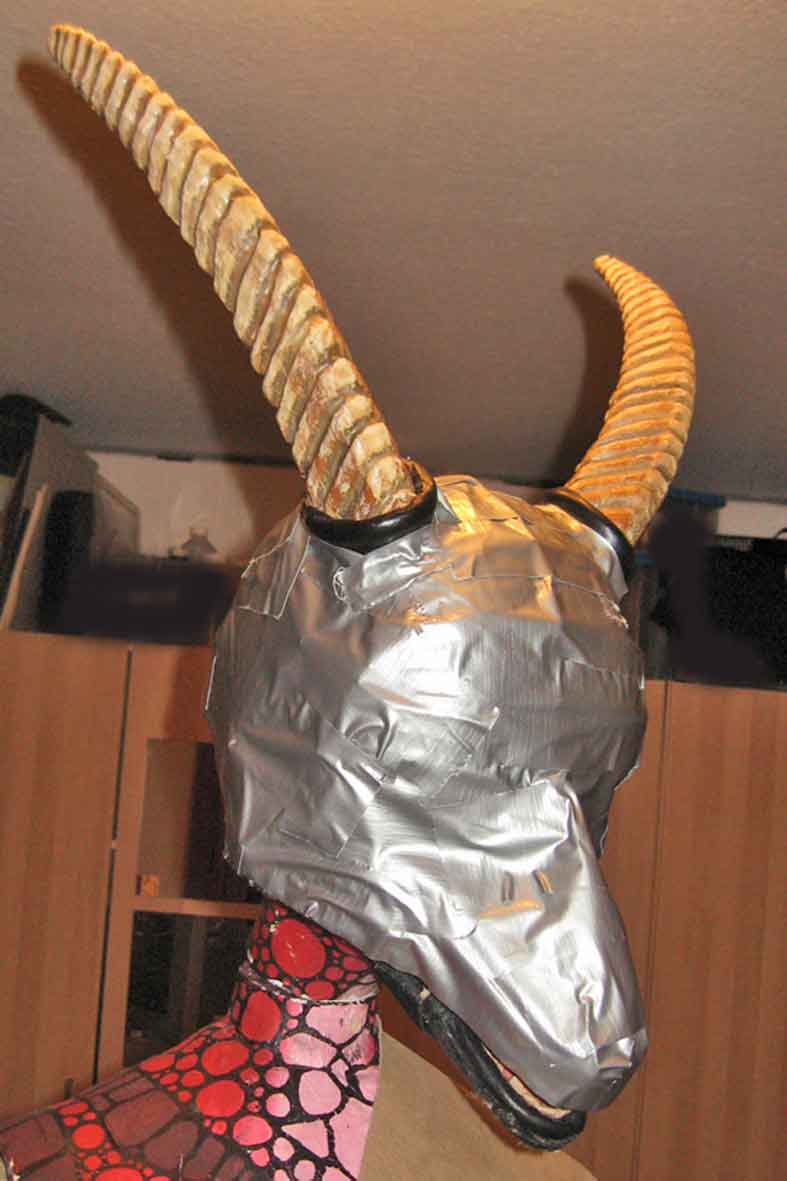
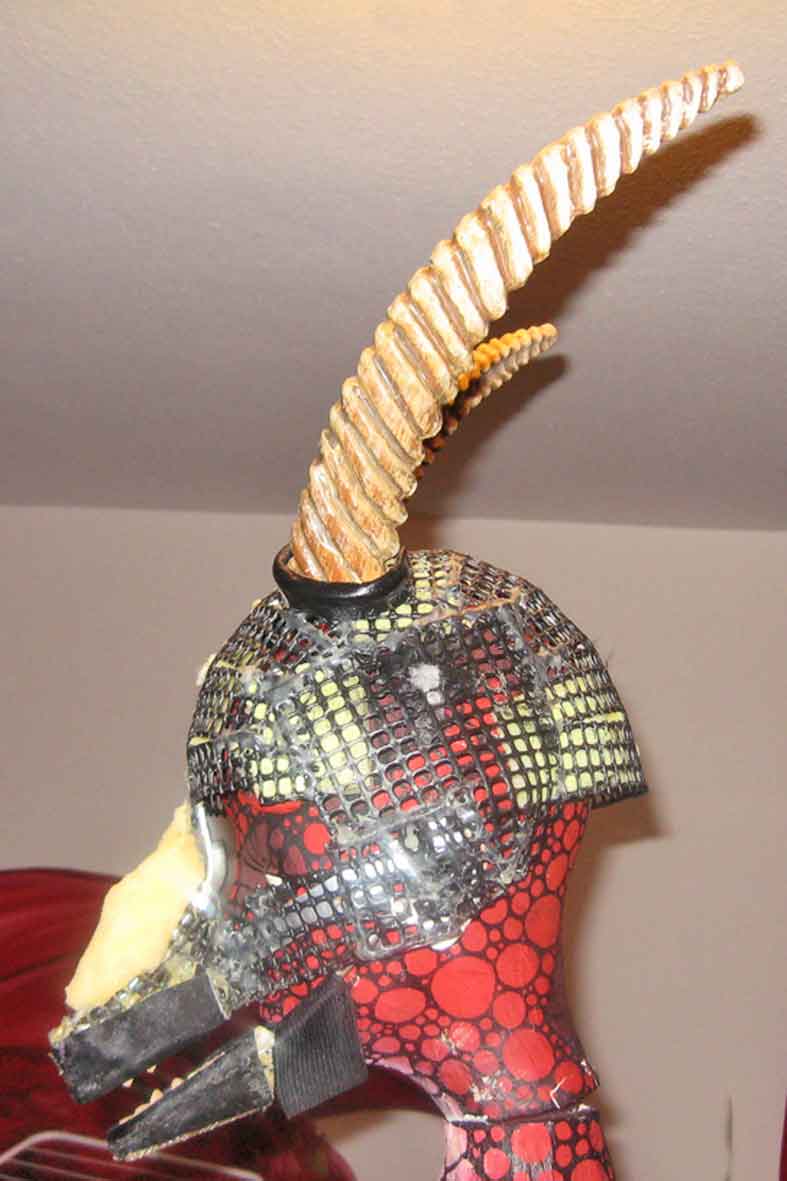
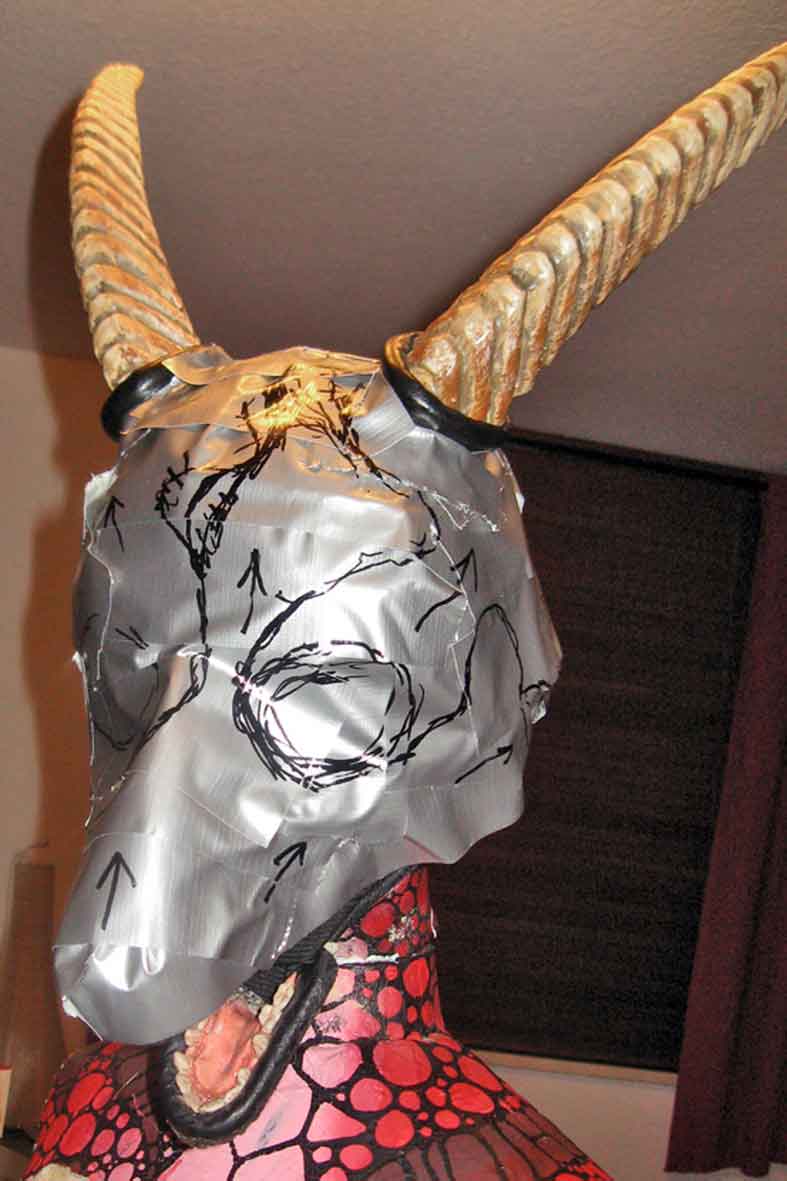
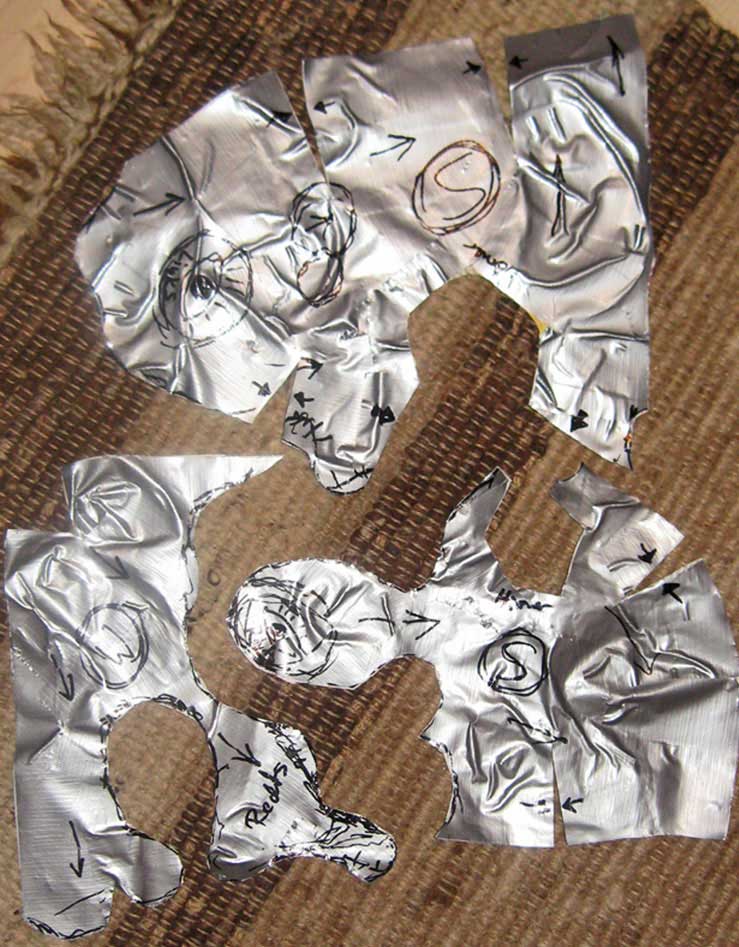
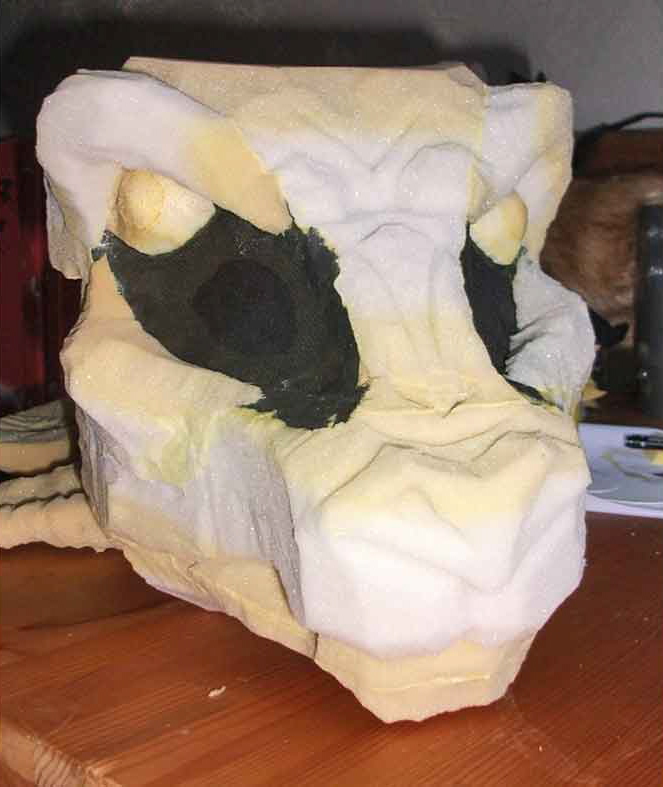
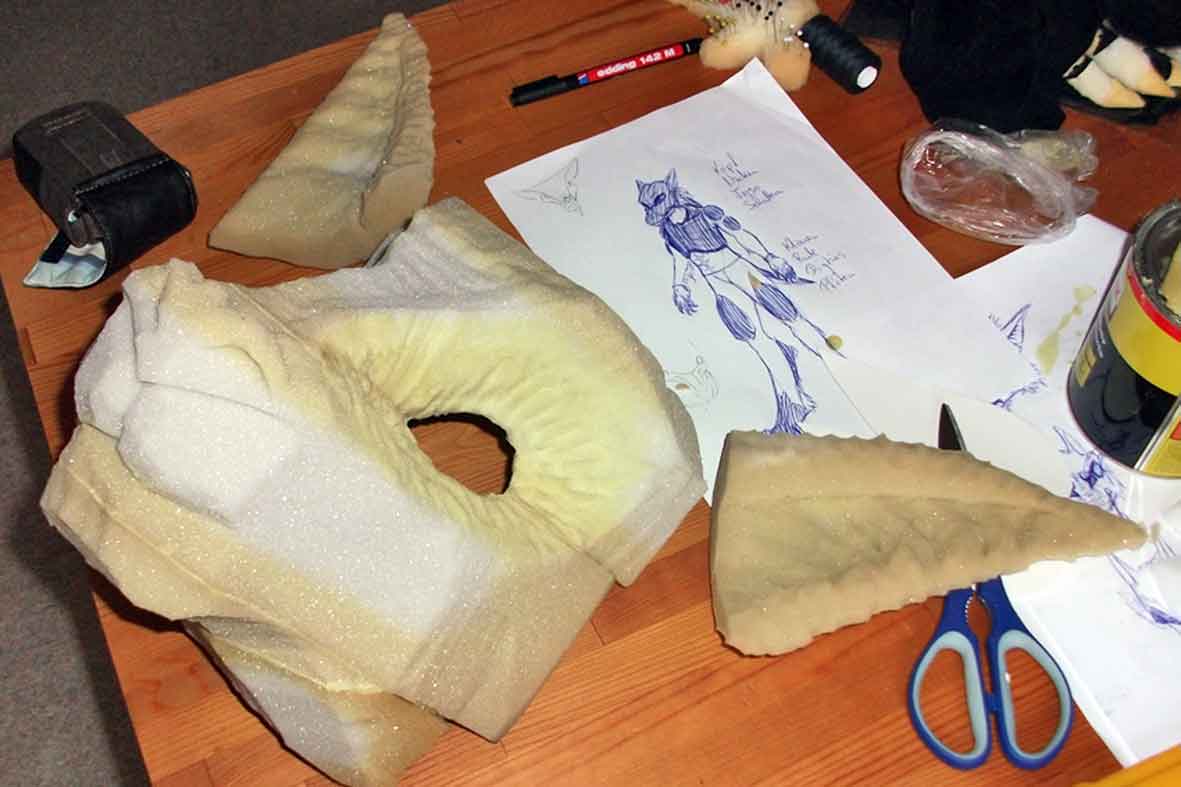
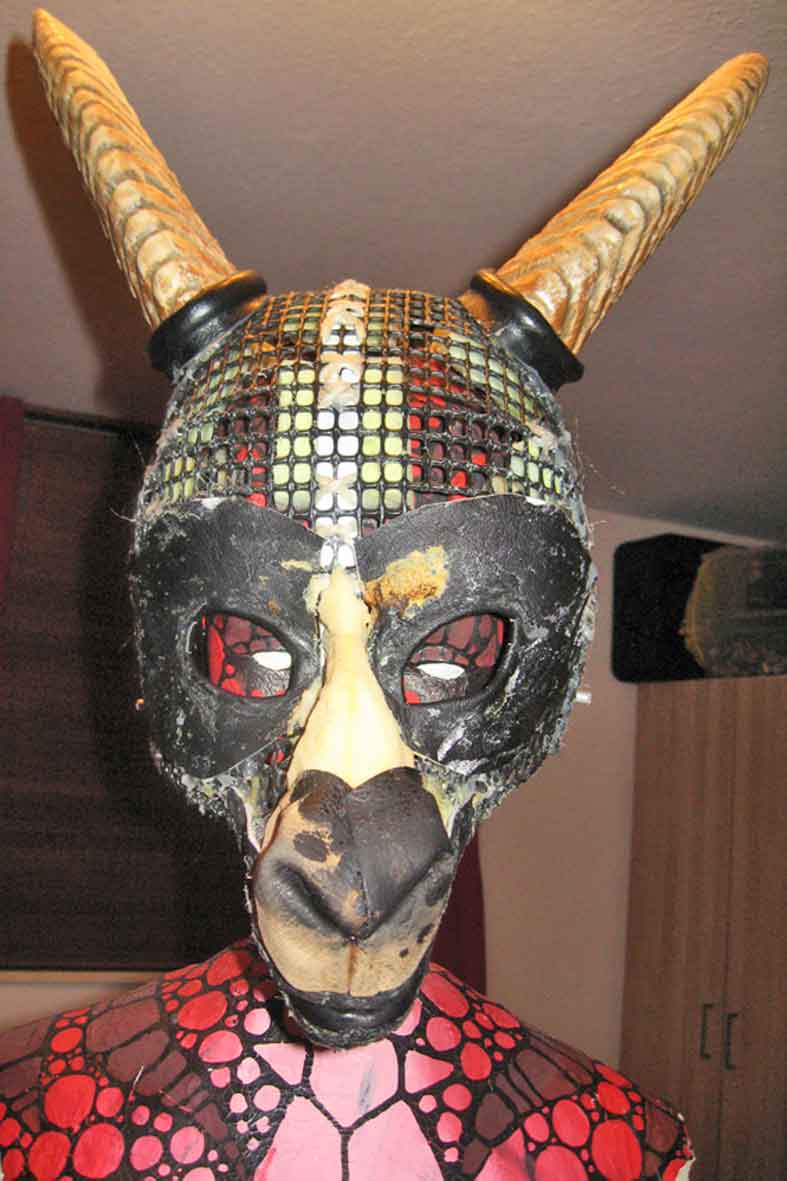
The maskīs carcass mainly consists of foam- padded mesh. In the next step it is covered with tape on which the patterns of the areas of black and white fur are drawn.

YMAn11
YMAn10 YMAn12

Above:
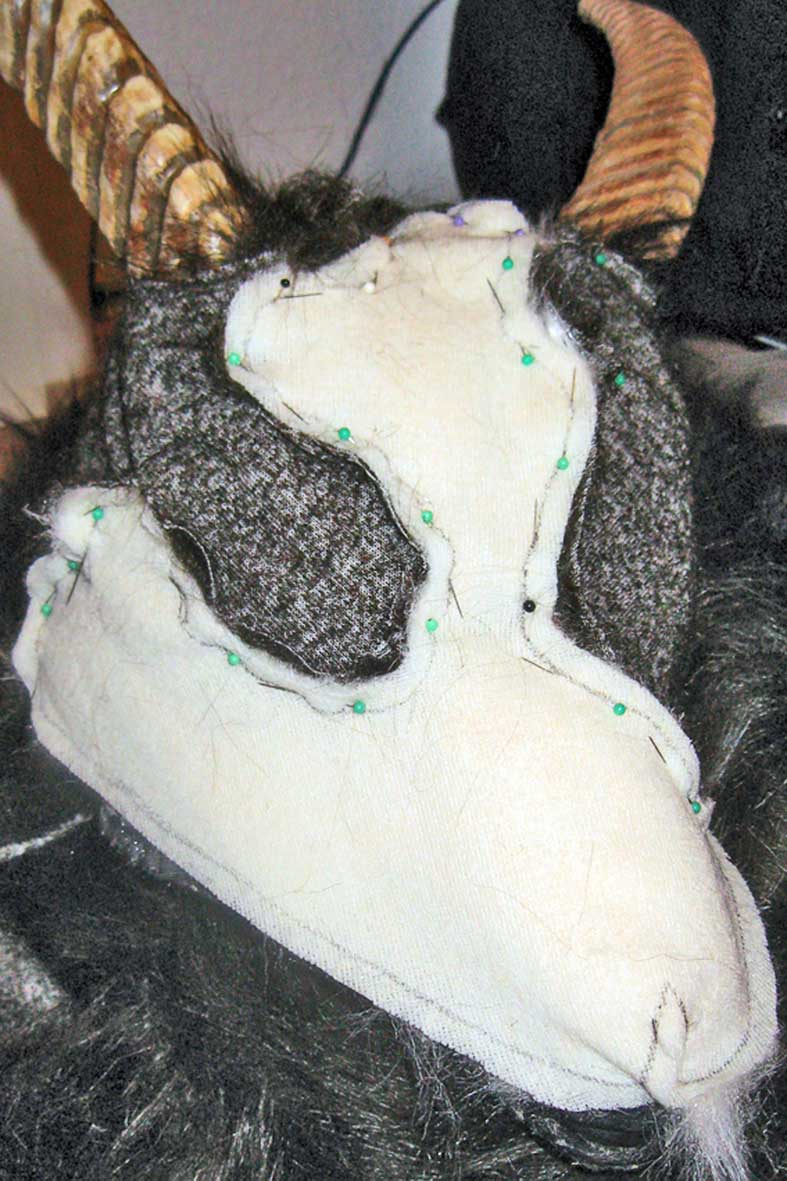
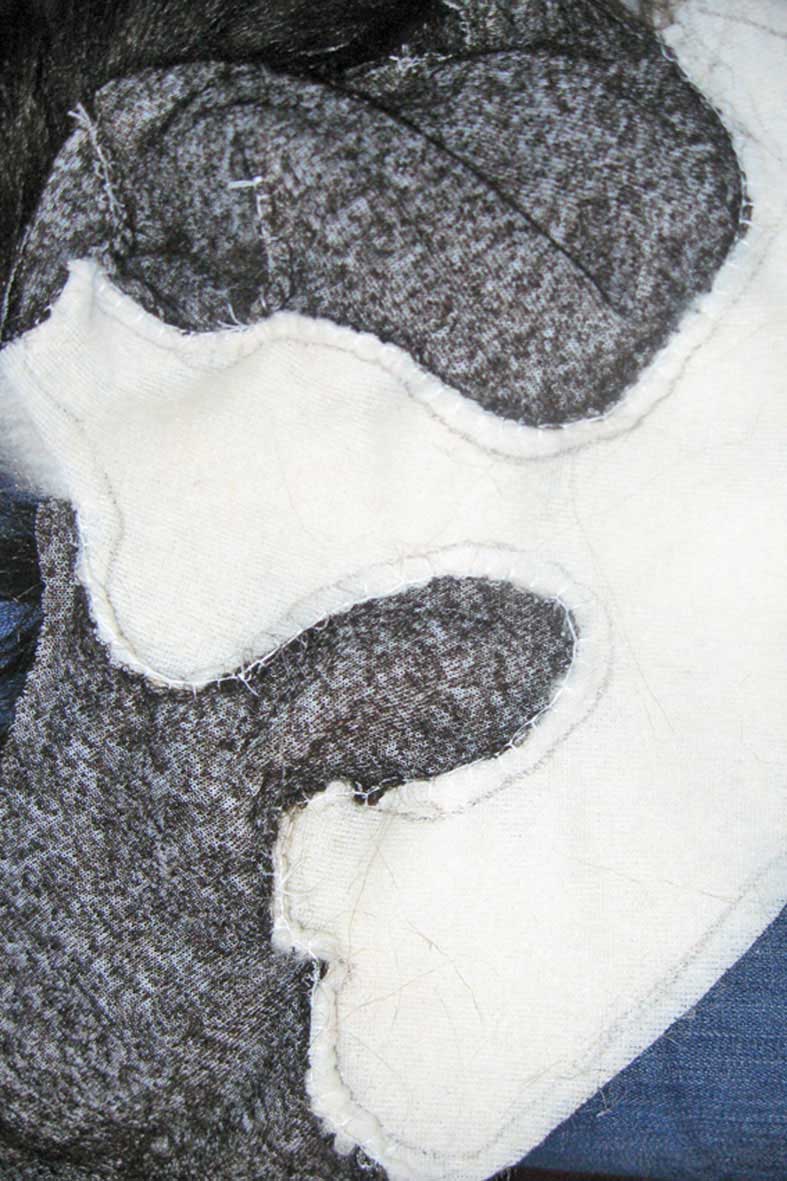
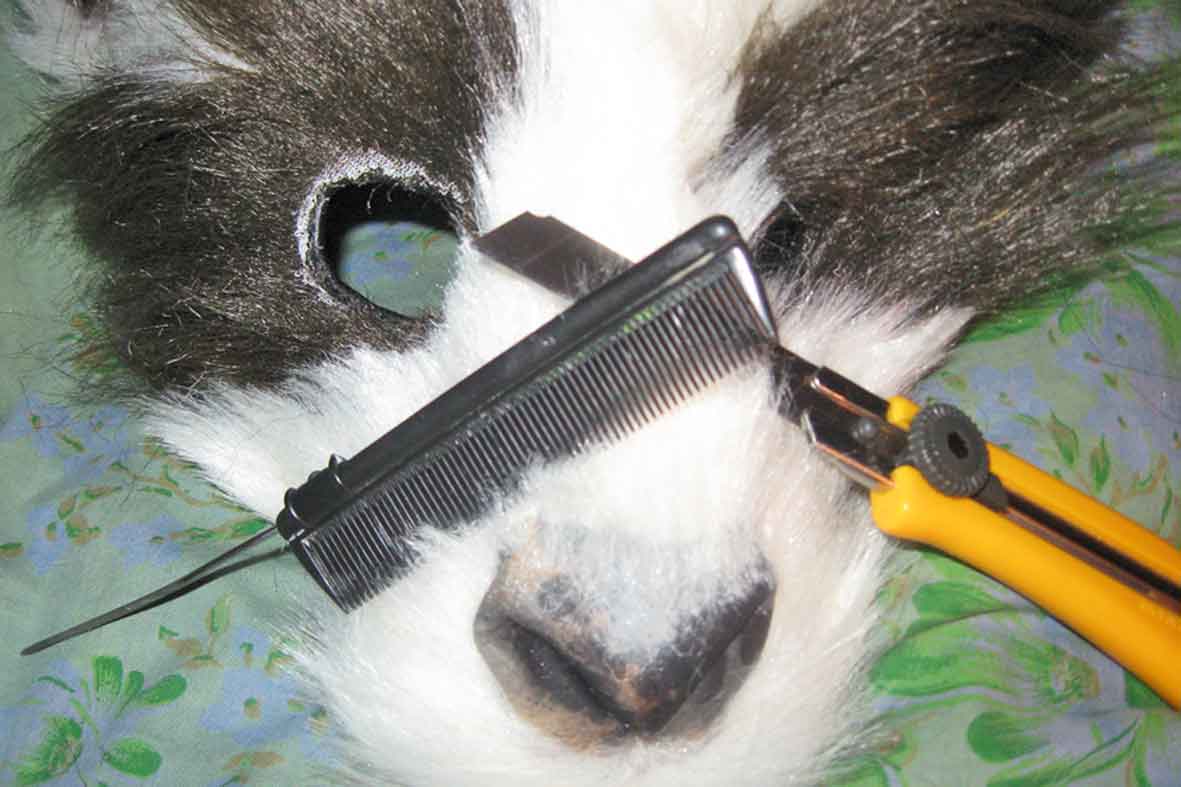
The tape cover is peeled off and cut along the drawn lines to create the pattern for the fur elements. These are pinned together with their insides and thus can be sewn together precisely.

YMAn13 YMAn14
YMAn15

Above:
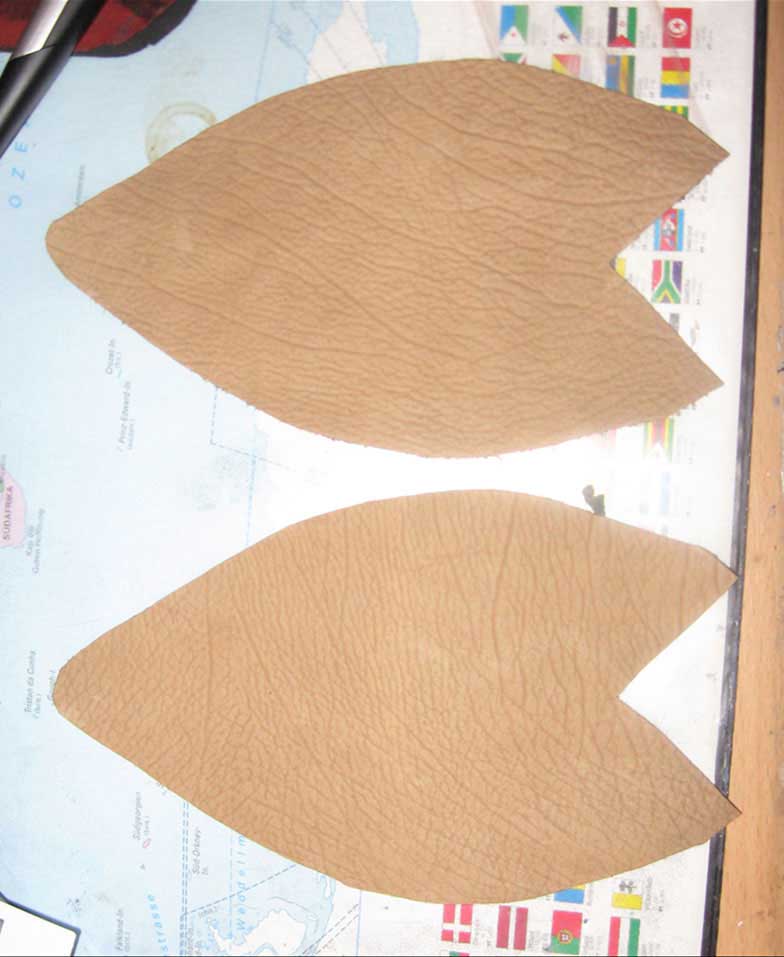
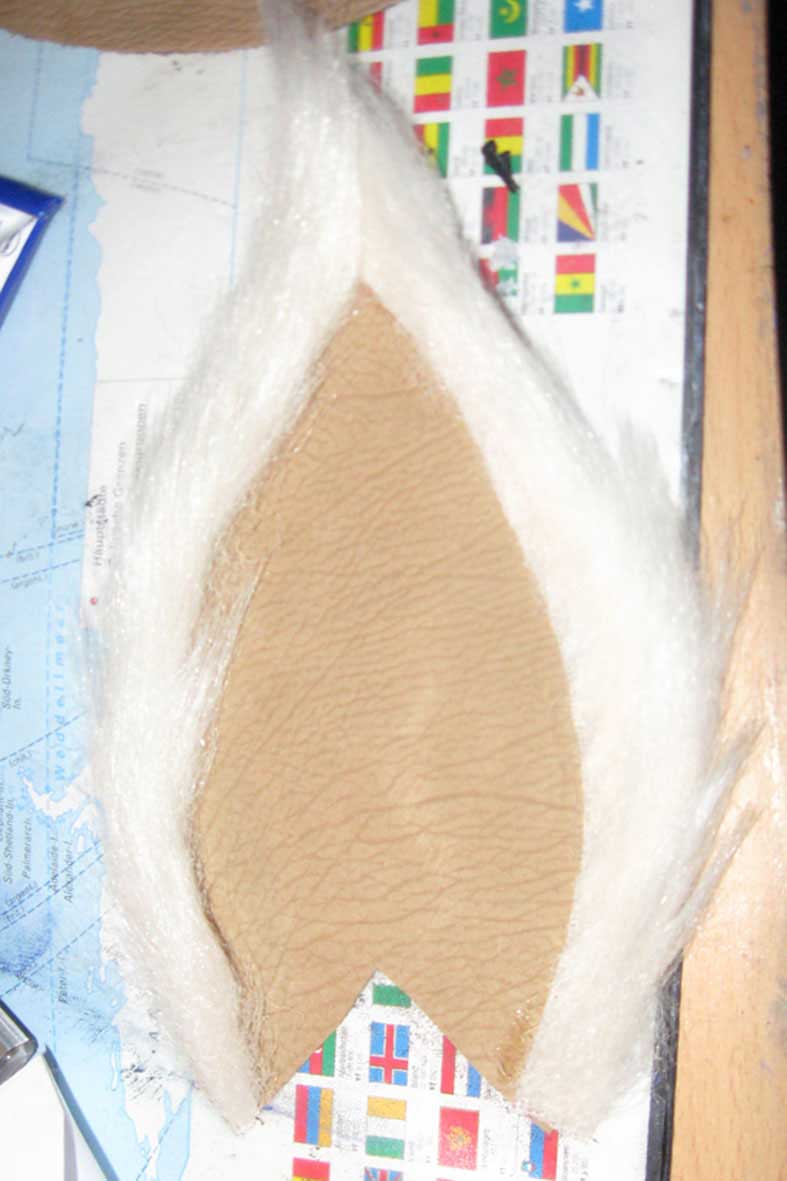
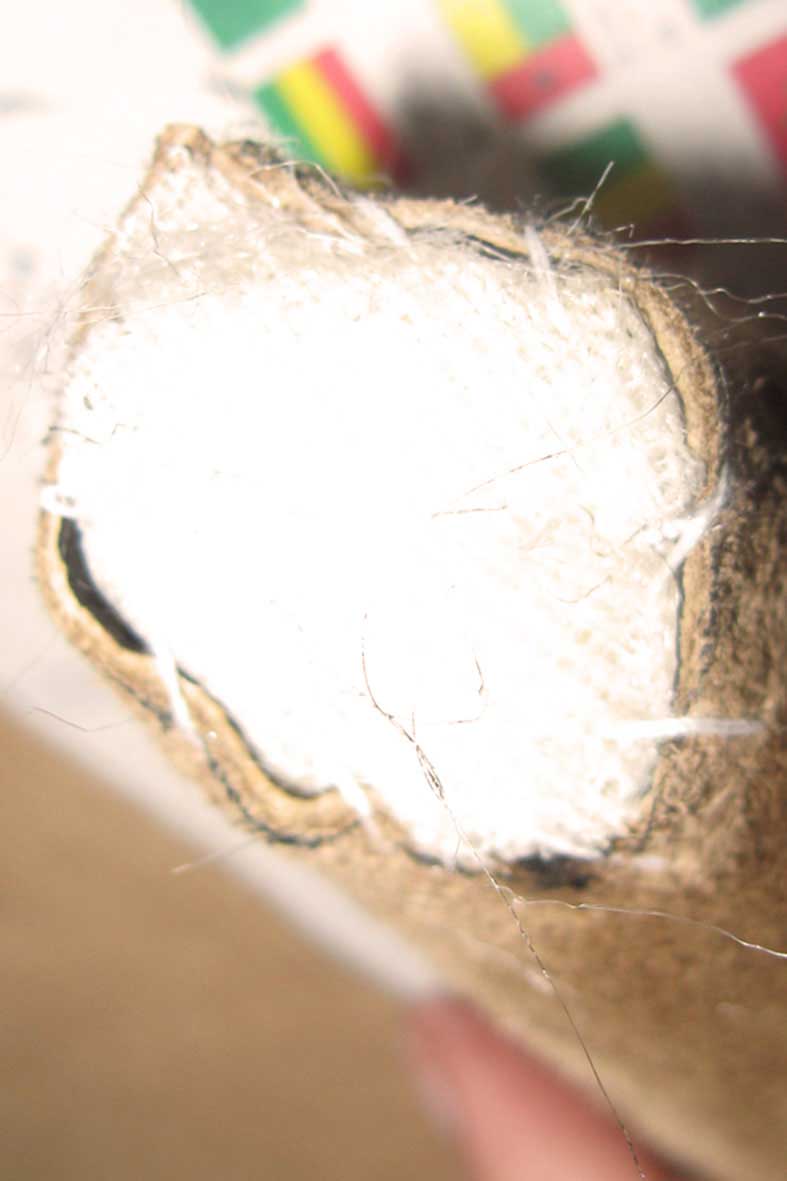
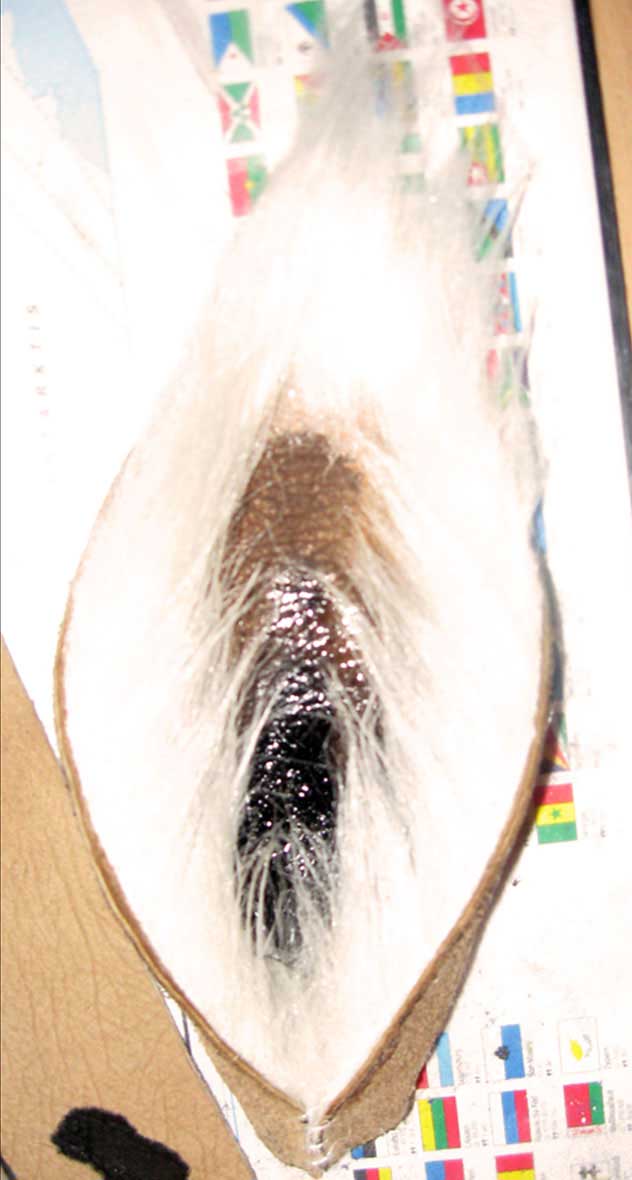
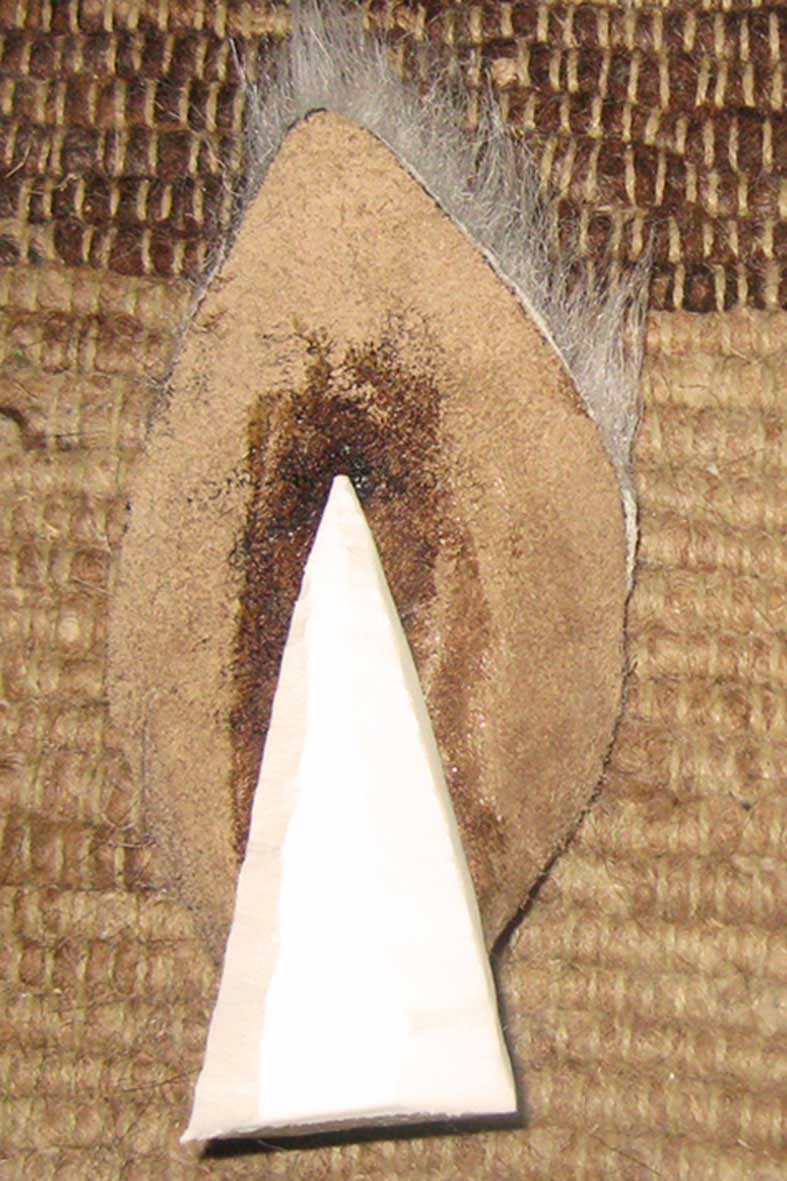
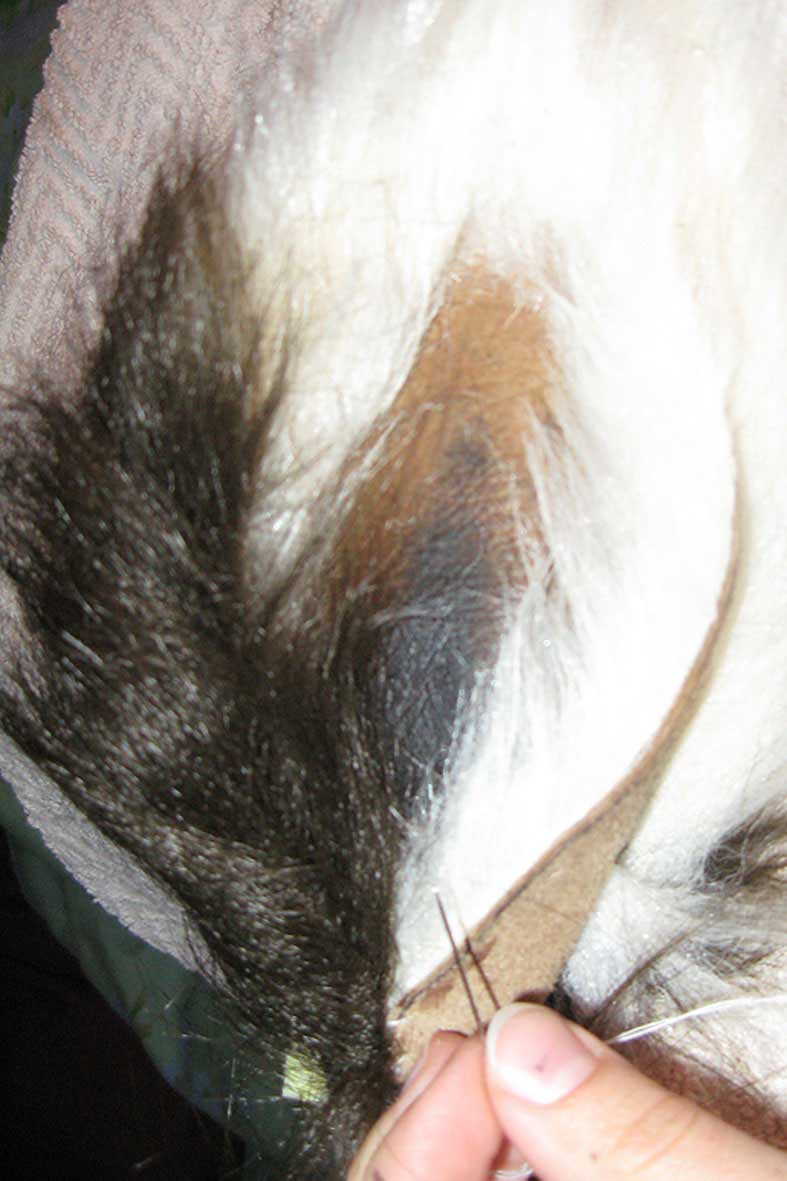
The ears. The paper pattern is transferred on leather and then a ledge of fur is glued on the inside. The interiors are dyed dark at the bottom, lighter to the top.

YMAn17
YMAn16 YMAn18

Above:
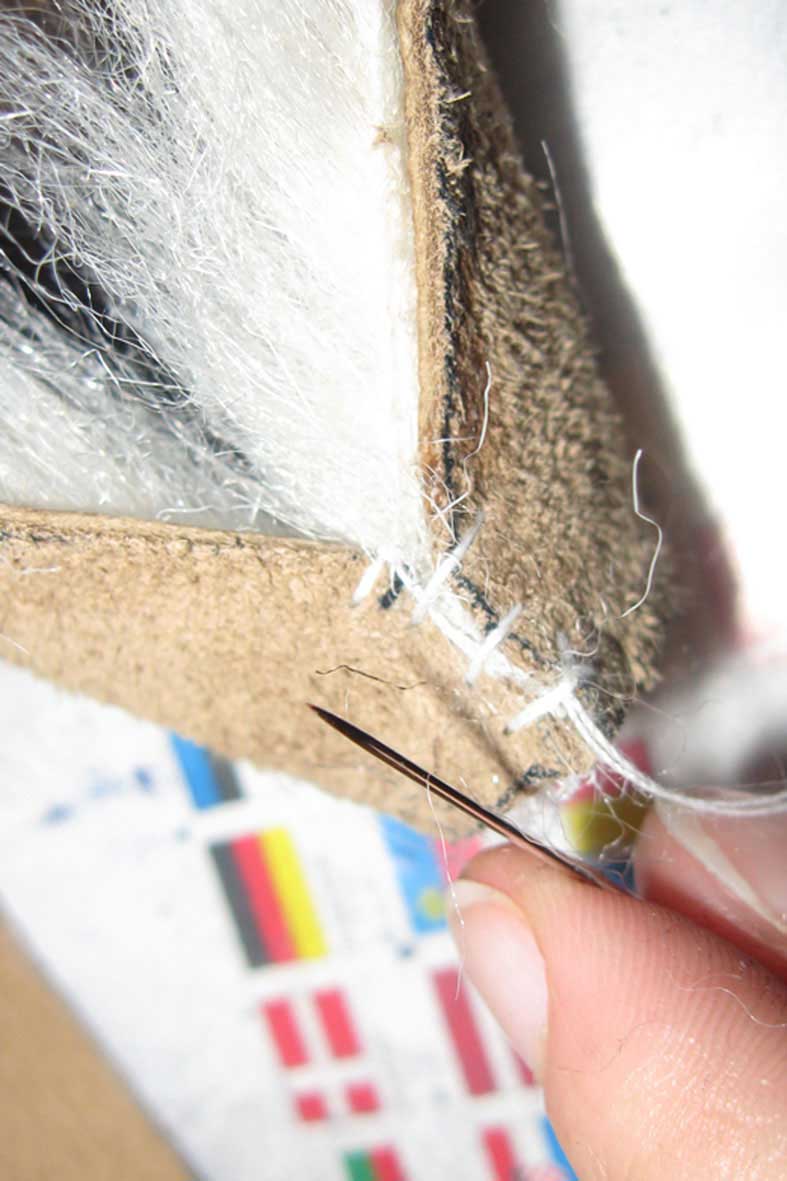
The ear is closed, the bottom part filled with fur and the whole thing styled with hairspray.

YMAn19
YMAn20 YMAn21

Above:
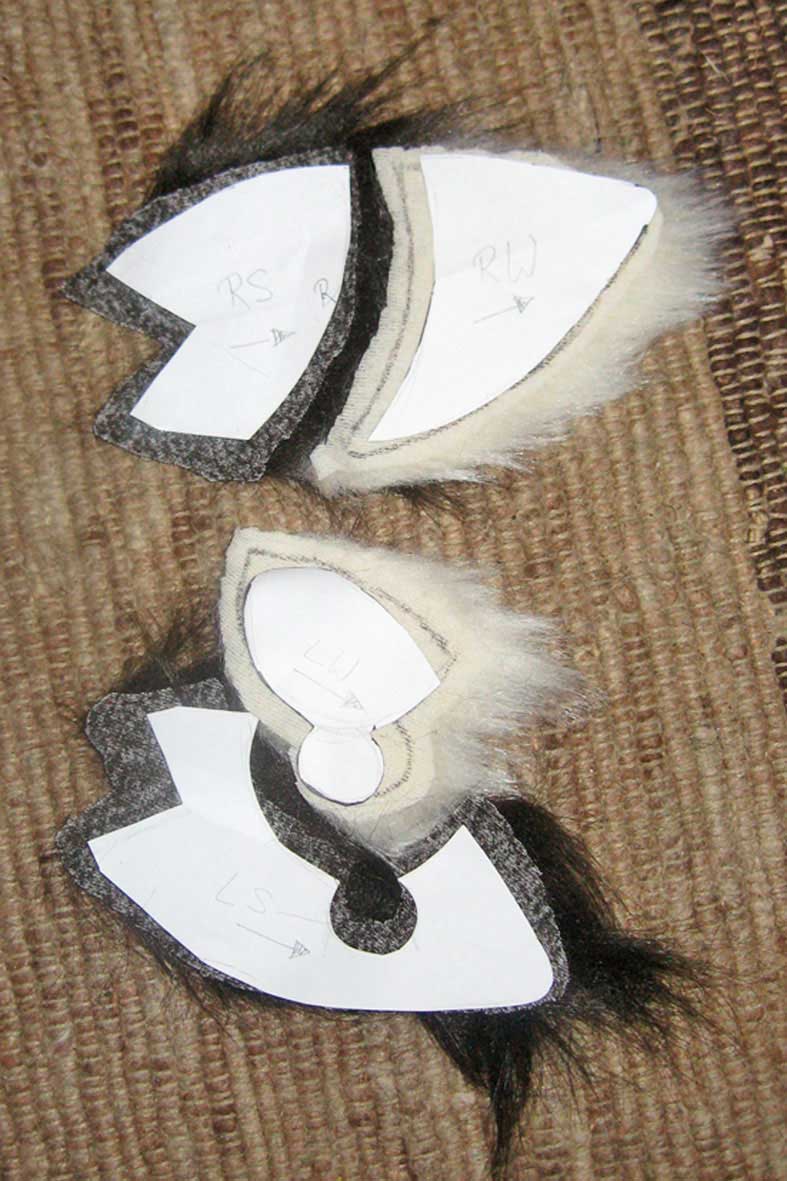
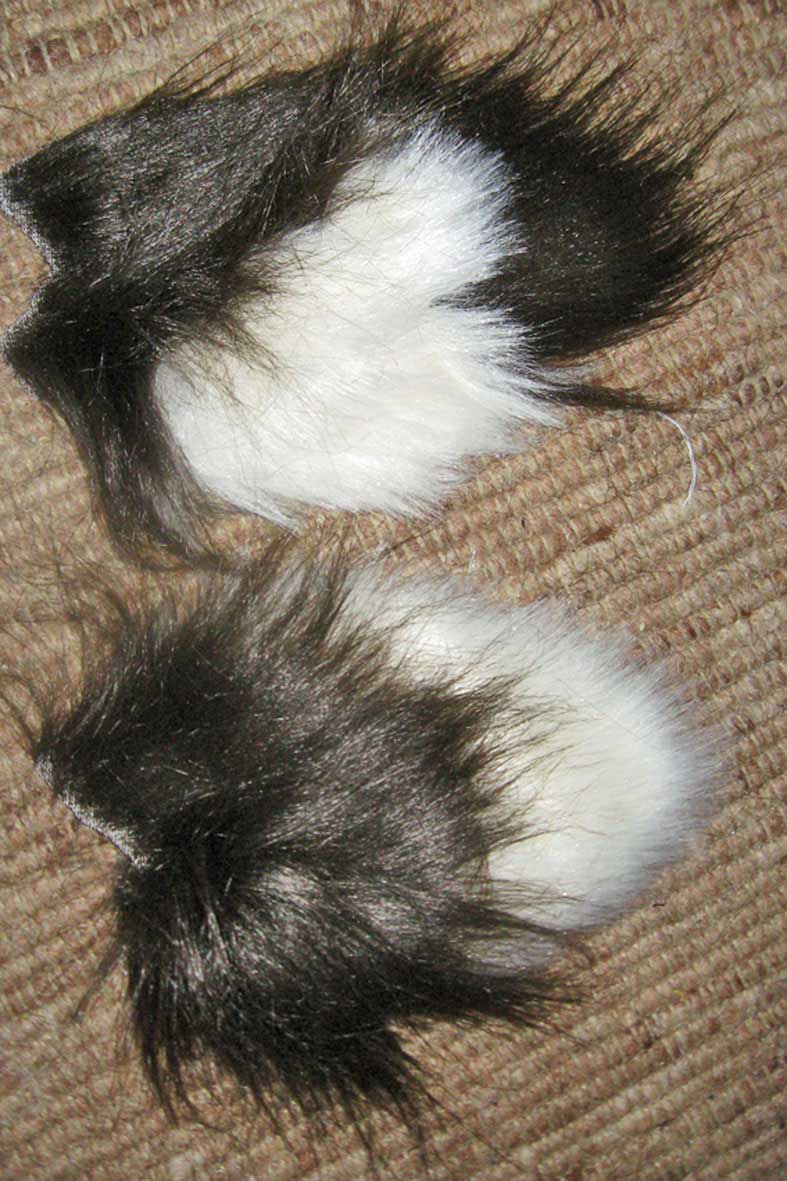
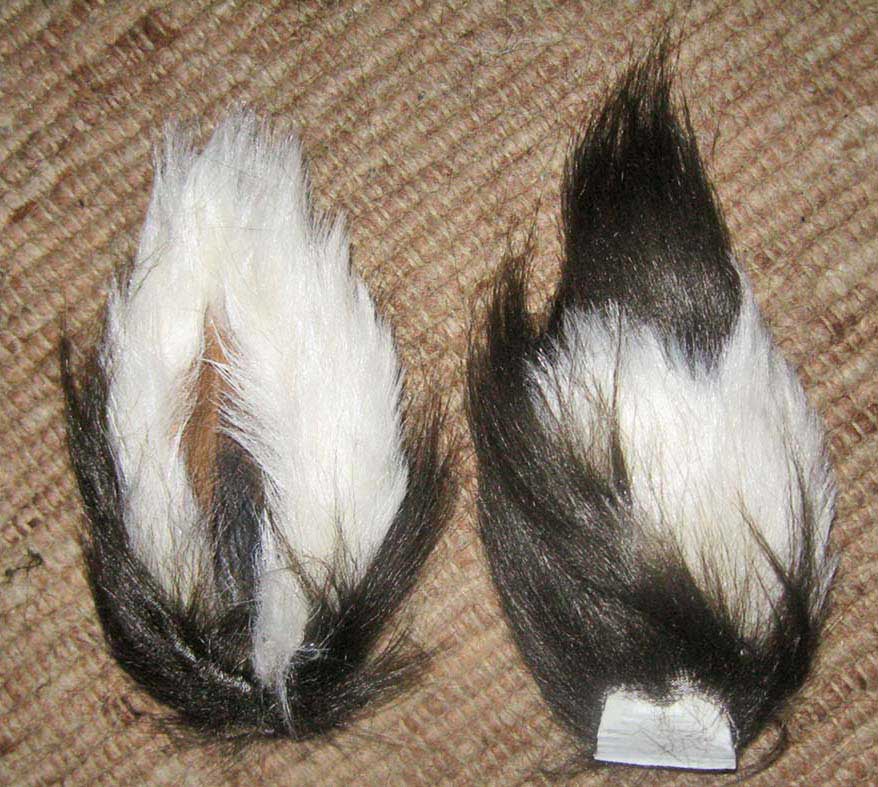
The earīs backside. A sustainer is glued on, then patterns for the allocation of white and black fur parts are made and transferred. When sewn together the fur will have to be trimmed.

YMAn22
YMAn26
YMAn24
YMAn25

Left: Assemblage
Above middle: the finished ears before trimming
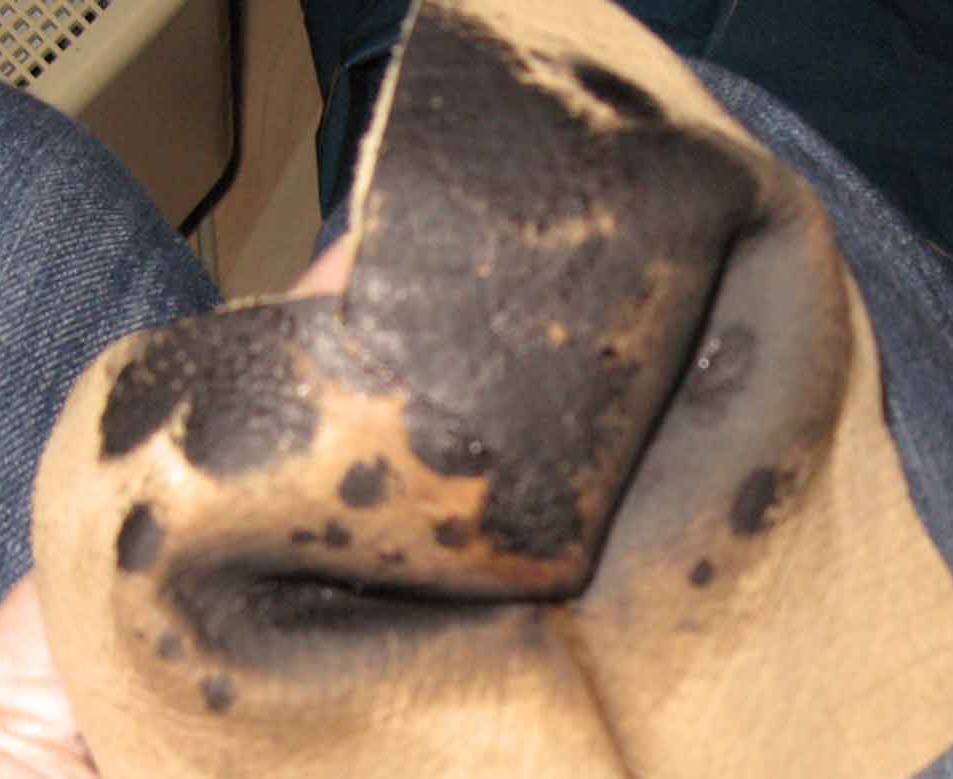
Above right: The nose is folded from a piece of leather. The authentic look is striking, isnīt it?

YMAn28
YMAn29

Above:
Carcass, nose and fur are assembled. All rims are concealed.

YMAn31
YMAn30

Above:
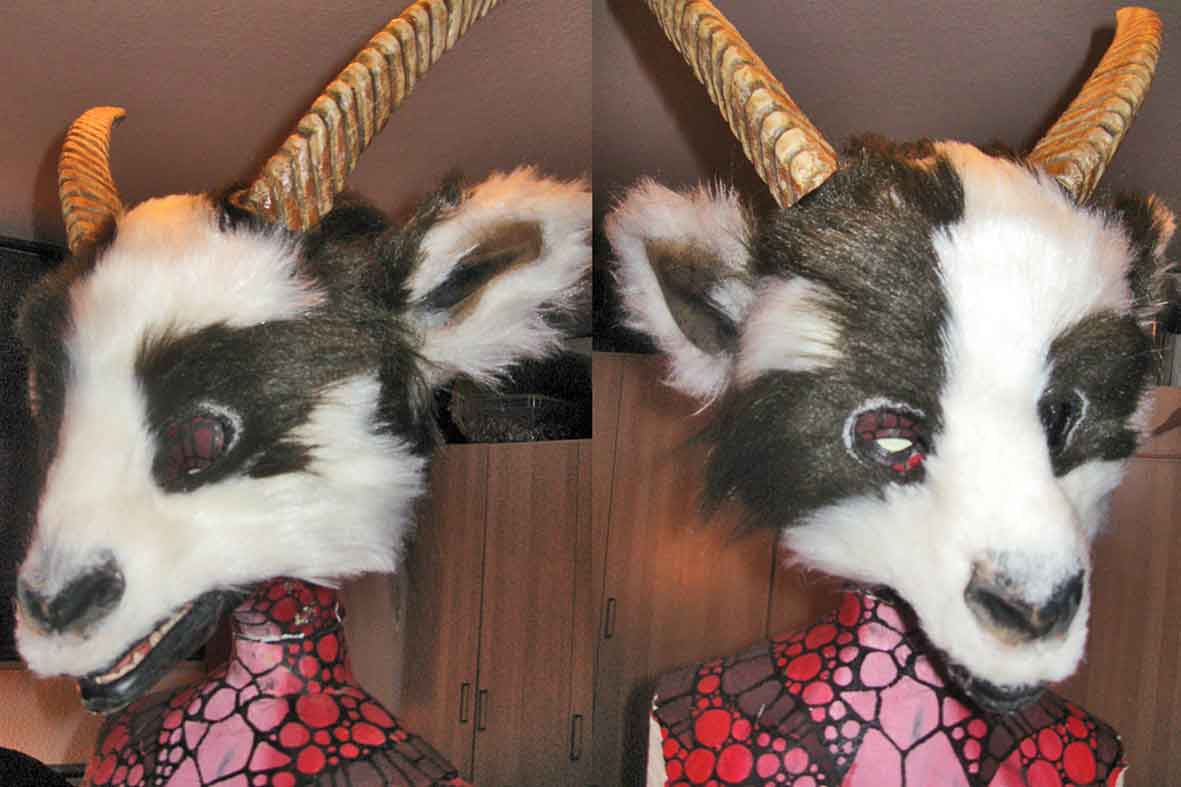
Hairdressing. Gradually the final complexion appears.

YMAn33 YMAn36

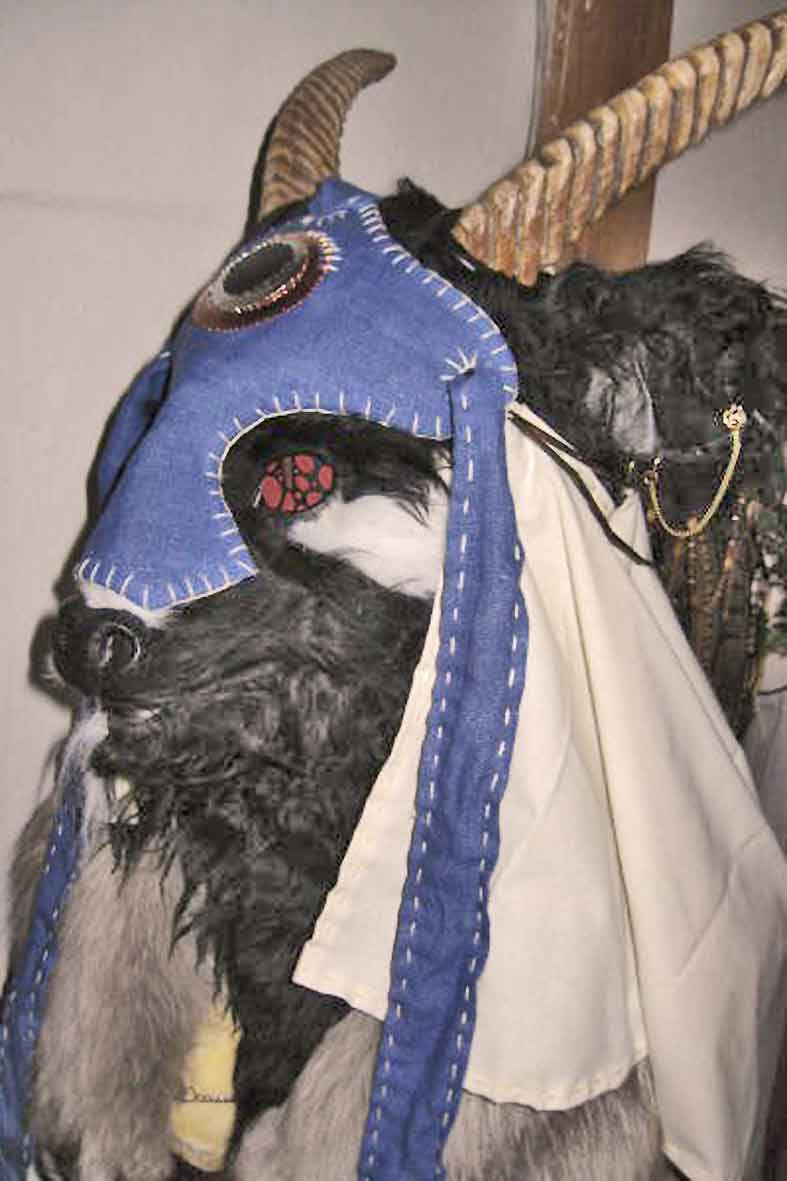
Above left: Beastmen are intelligent, wear armour and jewellery and can speak. Their “clothing” however fulfills other purposes then protecting against cold or rain: it has ritual significance or proclaims rank.
See above the equivalent of a helmet for people with horns.The shield is made of linothorax that was covered with cloth.

Above right: Thus they should look! The goat by the way has no fur under the clothes which are air- permeable. This helps against the suits getting warm.
And one would like to complement her on her legs...

YMAn40
YMAn39

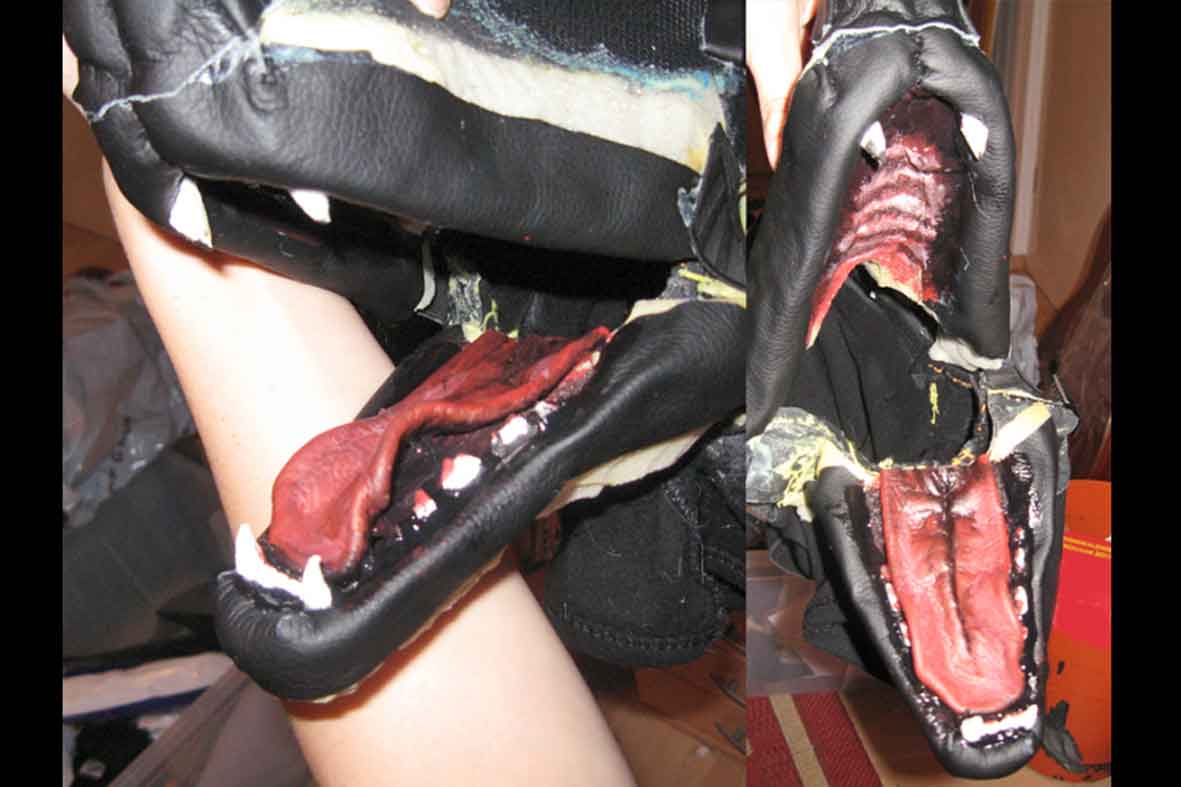
Above left: Jaws for a badger.
Teeth, maw and snout are made of different sorts of foam, tongue is painted leather. Teeth still have to be painted at this stage (work from the inside out). Lips and nose are artificial leather.

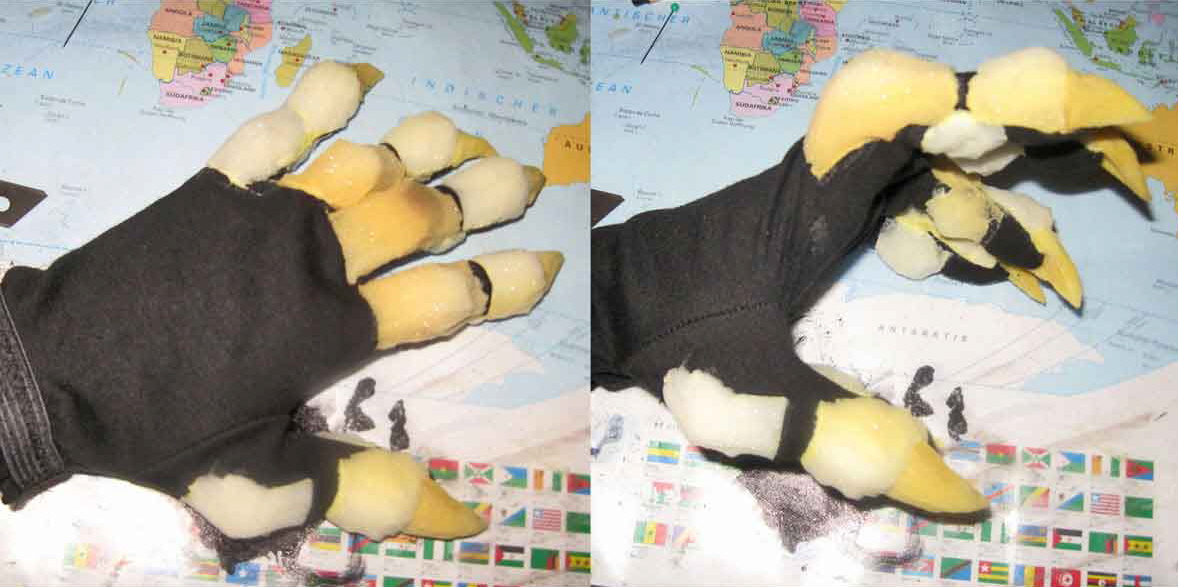
Above right: Claws made out of gloves.
Here is Annikaīs original text:
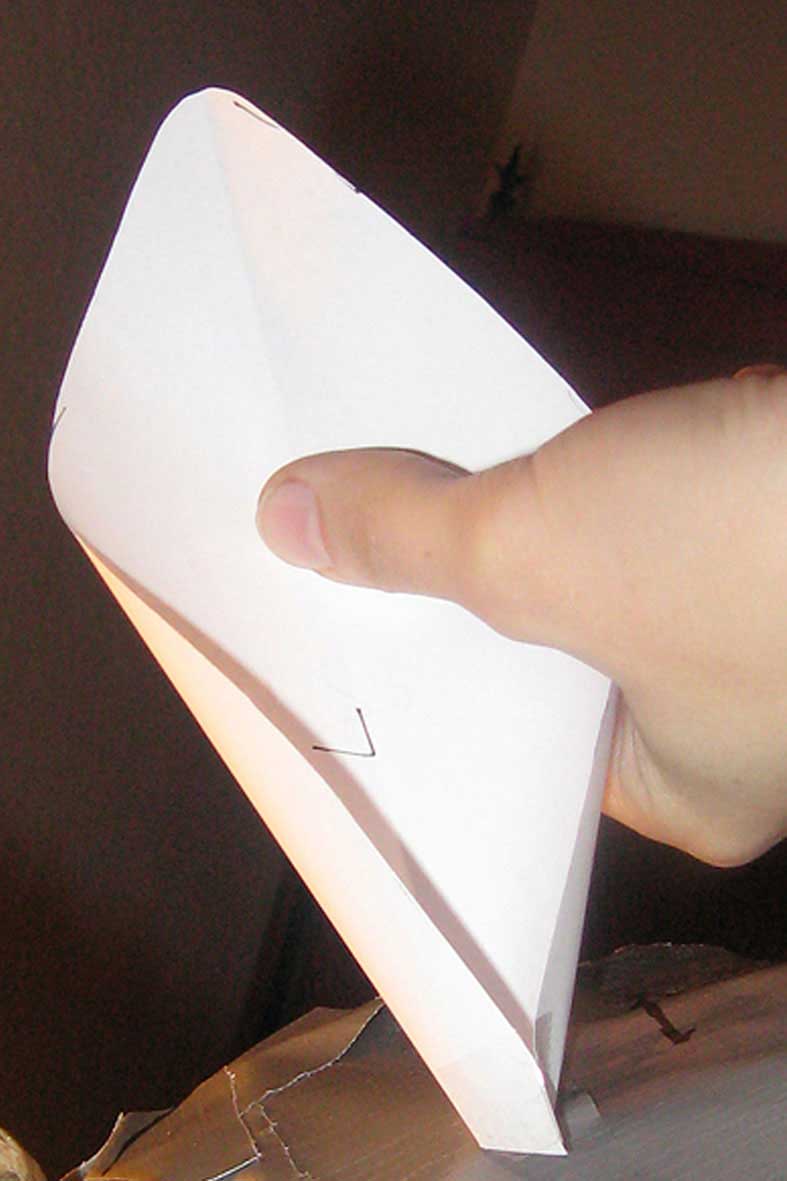
Itīs really easy: cut off the fingers of the gloves but leave the first joint (phalanx). Then cut leather patterns in the form of an ice-cream cone and sew the “claws” with rounded sides. The leatherīs rough side should make the outer surface. Glue the claws onto the glovesī fingers and cover the outer surface with 3-5 layers of Pattex. Then paint the claws and glue on the fur.
The claws are quite rigid but the fingers can still be employed.

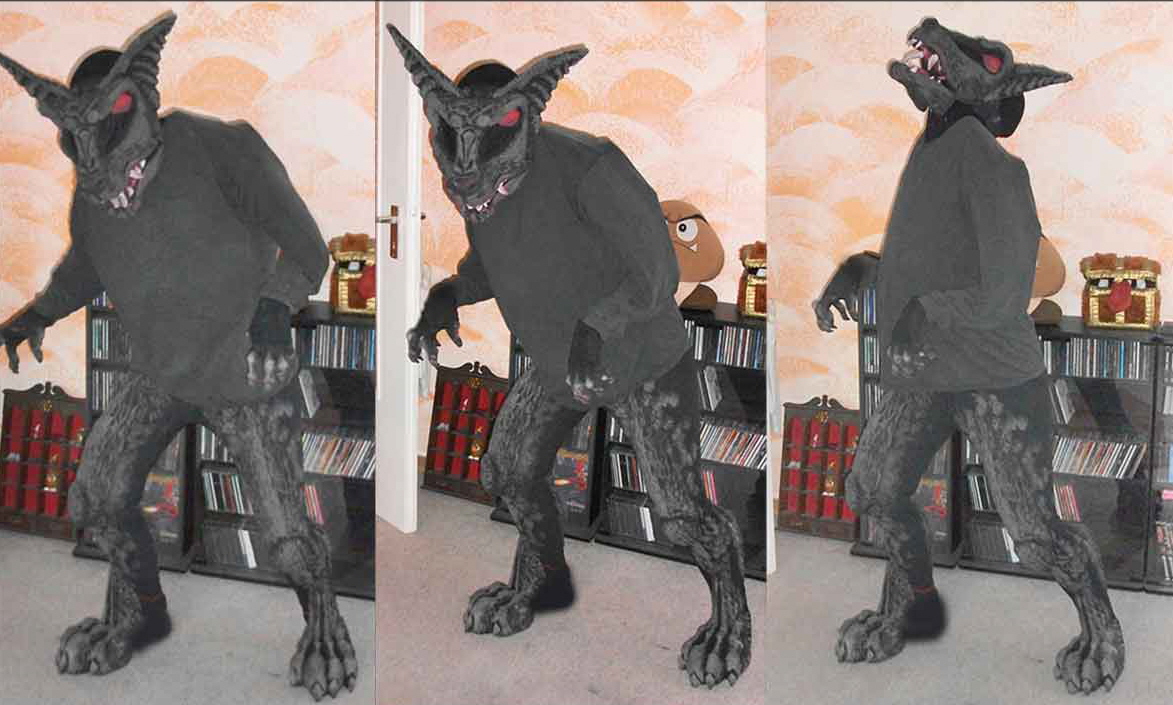
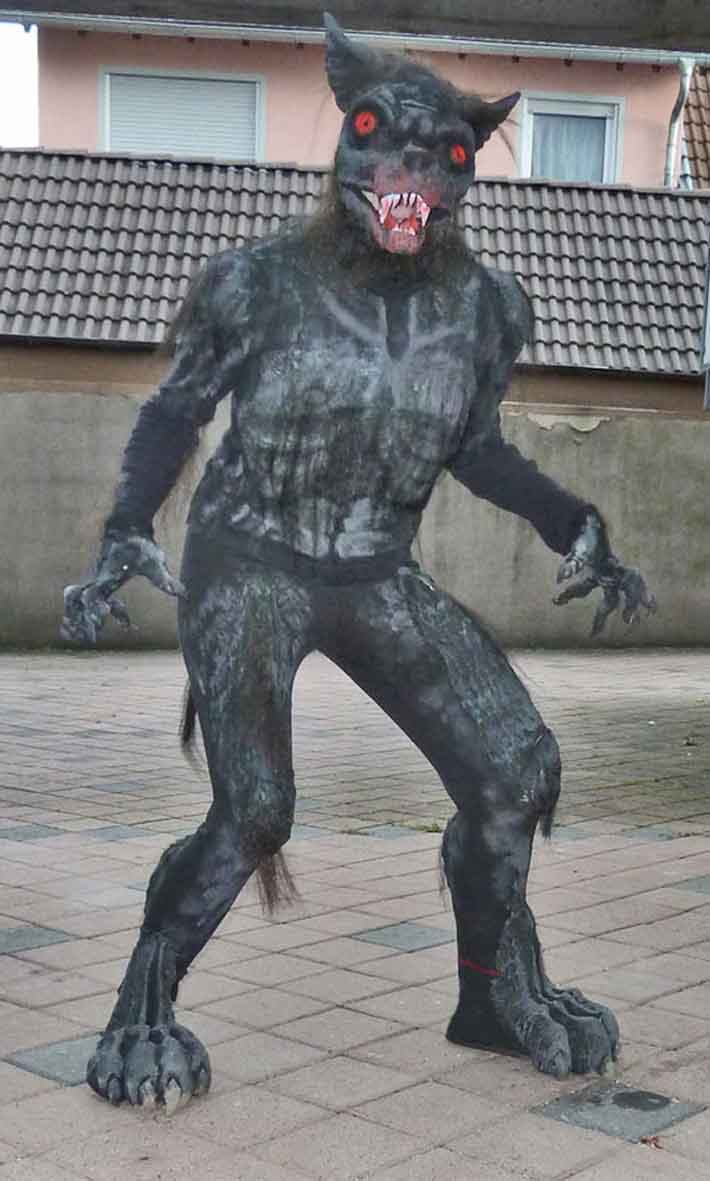
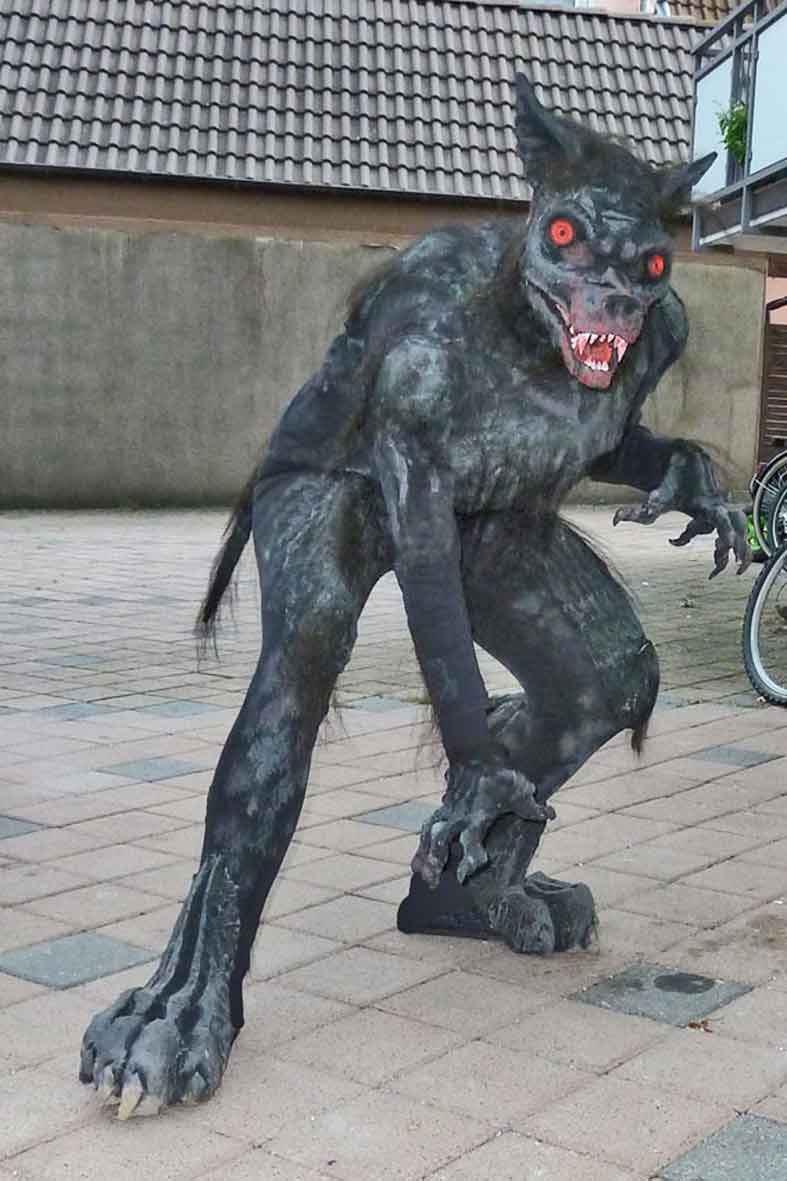
Below: A werewolf.  This is an NPC- monster that contrary to charcters has to be built as time-effectively as possible.
Notice the false, illuminated eyes. The real eyes of the puppeteer are concealed in the inner corners of the maskīs eyes.

YMAn41
YMAn43
YMAn42

Above: The mask. From here on Annikaīs text again:
The mask is built around a balaclava- mask. The tutorial from the link below was employed:
http://www.matrices.net/balaclava.asp. As “eyes” plexiglass medaillons come in handy. They can be painted according to your whims from the inside and will gleam quite nicely.
To cover the holes the puppeteer sees through two layers of black fly screen were used with the second one being turned 45 degrees. Sight is good and the puppeteerīs eyes are invisible in the shadows.

YMAn44

Above: Werewolf- claws
Simple cheap cotton gloves with a rubber band sewn on at the rear around the wrist to keep them in place. Paddings carved from matress foam and glued on.

YMAn45

The legs and feet as the rest of the outfit are also carved out of matress foam. The feet have cuttings for the puppeteerīs shoes and reach a litte further to the ground to fully cover them.
The feet have stirrups made of broad rubber band to keep them in place. Pay heed not to stretch them too much as they might tear off. With the stirrups loose enough the feet will move quite naturally.
 
All foam parst were then covered with Pattex (leave out the cloth patrs of balaclava, leggings and gloves or the cloth will become too rigid). When the Pattex is hand- dry, press it into the surface to close the pores.

Before painting I used black tinting paint as ground, then drybrushed and highlighted with grey. Use the greys also on the black cloth parts.
Iīve then applied red paint to teeth, claws and mouth- area which was then smudged using my hands; this will create a more realistic- looking red gleam than splashes ;). Jaws, nose and eyes were then treated with clear laquer to achieve a moist look.

YMAn51
YMAn50

cost report for the wolf (2011):
balaclava: ca. 5€
rubber band: 1,40 €
foam: Iīve used old material, donīt know what it would cost if you buy it
lots of Pattex, letīs calculate 2 big cans ~18€ each = 32 €
cotton gloves: 2€
leggings: ca. 5€
longsleeve: ca. 8 €
tinitng paint black & white á 5€ = 10€
tinting paint red (small) 3 €
brushes, scissors, carpet knifes etc..

By the way: the wolf was finished in 2012 and is documented at Blogspot:
http://lowbudgettierwesen.blogspot.de/2012/08/low-budget-tierwesen-selbst-machen.html

Me again:
This documentation covers several domains of the wide field of creature- building and shows a few of the many working- techniques any materials you need to transform a heap of something into something like this.
When you build things without using any prefabricated parts but create the ones you need by  yourself it is called “scratch- building”.
I consider this the highest form of manufacturing.

Thanks a lot for these insights into the operation procedures!

[Home] [Deutsch] [English] [about me] [whatīs new] [Contents] [about monsters] [faqs] [other sites]